Software Documentation Version 3.0
Introduction
- Name : CHECKIT
- Version : 3.0
- Author : CHECKIT Team
- Framework : FYNX Framework
- License : Commercial License
First of all, Thank you so much for purchasing CHECKIT digital testing
system and for being our loyal customer.
You are awesome!
We would also like to thank everyone who has contributed to this
product, including the beta testers, technical reviewers, friends & you,
our loyal customer.
Please do send us your valued feedback by posting comment on this products website here or emailing to support@thecheckit.com
Server Requirements
PHP version 5.4 or newer is required, with the *intl* extension and *mbstring* extension installed.
The following PHP extensions should be enabled on your server:
php-json,
php-mysqlnd,
php-xml
In order to use the CURLRequest, you will need libcurl installed.
A database is required for most web application programming. Currently supported database(s) are:
- MySQL (5.1+) via the MySQLi driver
Not all of the drivers have been converted/rewritten for FYNX. The list below shows the outstanding ones.
- MySQL (5.1+) via the pdo driver
Getting Started #back to top
CheckIT v3.0 is a User-Friendly, Super Fast, Easy to Use Digital Testing Management System, originally designed on a Next Gen PHP framework called FYNX (pronounced: finix), with various awesome Features that would make managing a Testing section not just Efficient, but Fun. This App comes as a Lite version (offline) or online SAAS version. Version 3.0 BETA is the Latest Ongoing release with Intelligent updates from the previous Version 2.
First-Time User Quick Guide
To Effectively Utilize CheckIT as a First-Time User, this Quick Guide would get you Scheduling Test/Exam(s) in no time;
- Register your firm/company/institution on the CHECKIT Registration Page and receive an E-mail that would have your Unique ID and Auth Credentials to access your App, or get details after an Installation of CheckIT-Lite version (Single User License).
- http(s)://{root_domain_name}/auth/signin/{your_unique_id}. Sign-in and update necessary settings like Courses, System Settings and a few others.
- From the Left Side-Bar, Add Questions to the Question Bank using the Question Menu, and then create a Test Schedule from the existing Questions using the Test Menu.
- Add Examinee(s) to the App with Auth Credentials using the Examinee Menu, and then Register them to an already existing Test Schedule by using the Register Action Button at the Right end of the Examinee(s) List Table.
- And that is it Guys! Examinee(s) can access scheduled Test/Exam(s) via your Personalized CheckIT URL with their Auth Credentials. Enjoy!
Installation #back to top
This installation process only applys to CheckIT-Lite users
Installation Process
- Copy/Upload the compressed file (zip, tar etc.) into desired/root folder on your web server using cPanel, FTP or just Copy/Paste
- Extract the compressed file in the desired/root folder where you want to run CheckIT Lite.
- Create mysql database Name, database User and grant all permission to user for this database; this will be required during the installation process (if your installation is on a local server, you do not need to create database name from RDBMS).
- Open the http(s)://{root_domain_name} and follow the instructions shown on the installation page as illustrated below:
- Complete the 7 stages progressive form of which you would be asked to also provide desired administrator account details, until the final stage of installation.
- Once installation requirement are met and completed to displaying a success page, CheckIT-Lite is ready for use!
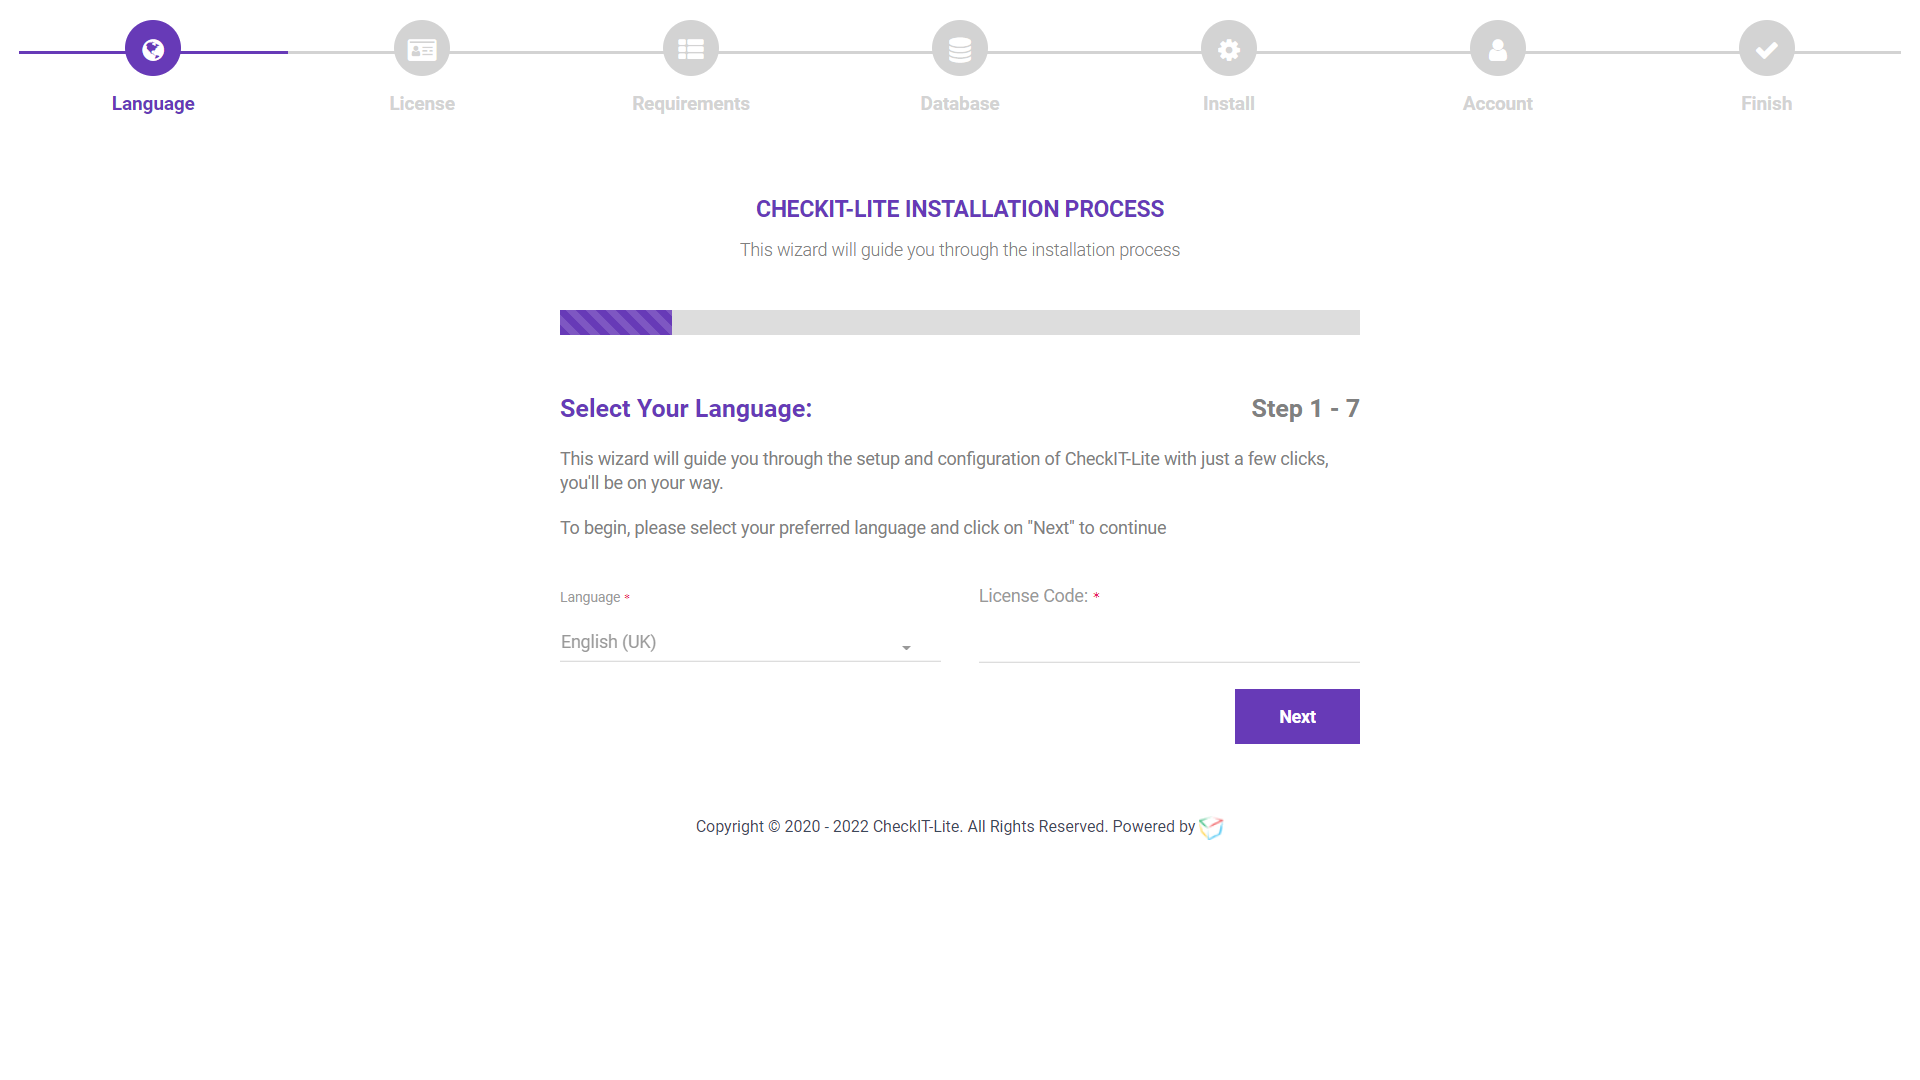
CheckIT-Lite Installation page
User Guide #back to top
Registration
Provide all the required fields on the registration page for SaaS users and click on the Register Button to create your account (Checkit-Lite users are excempted from this section, visit Installation section).
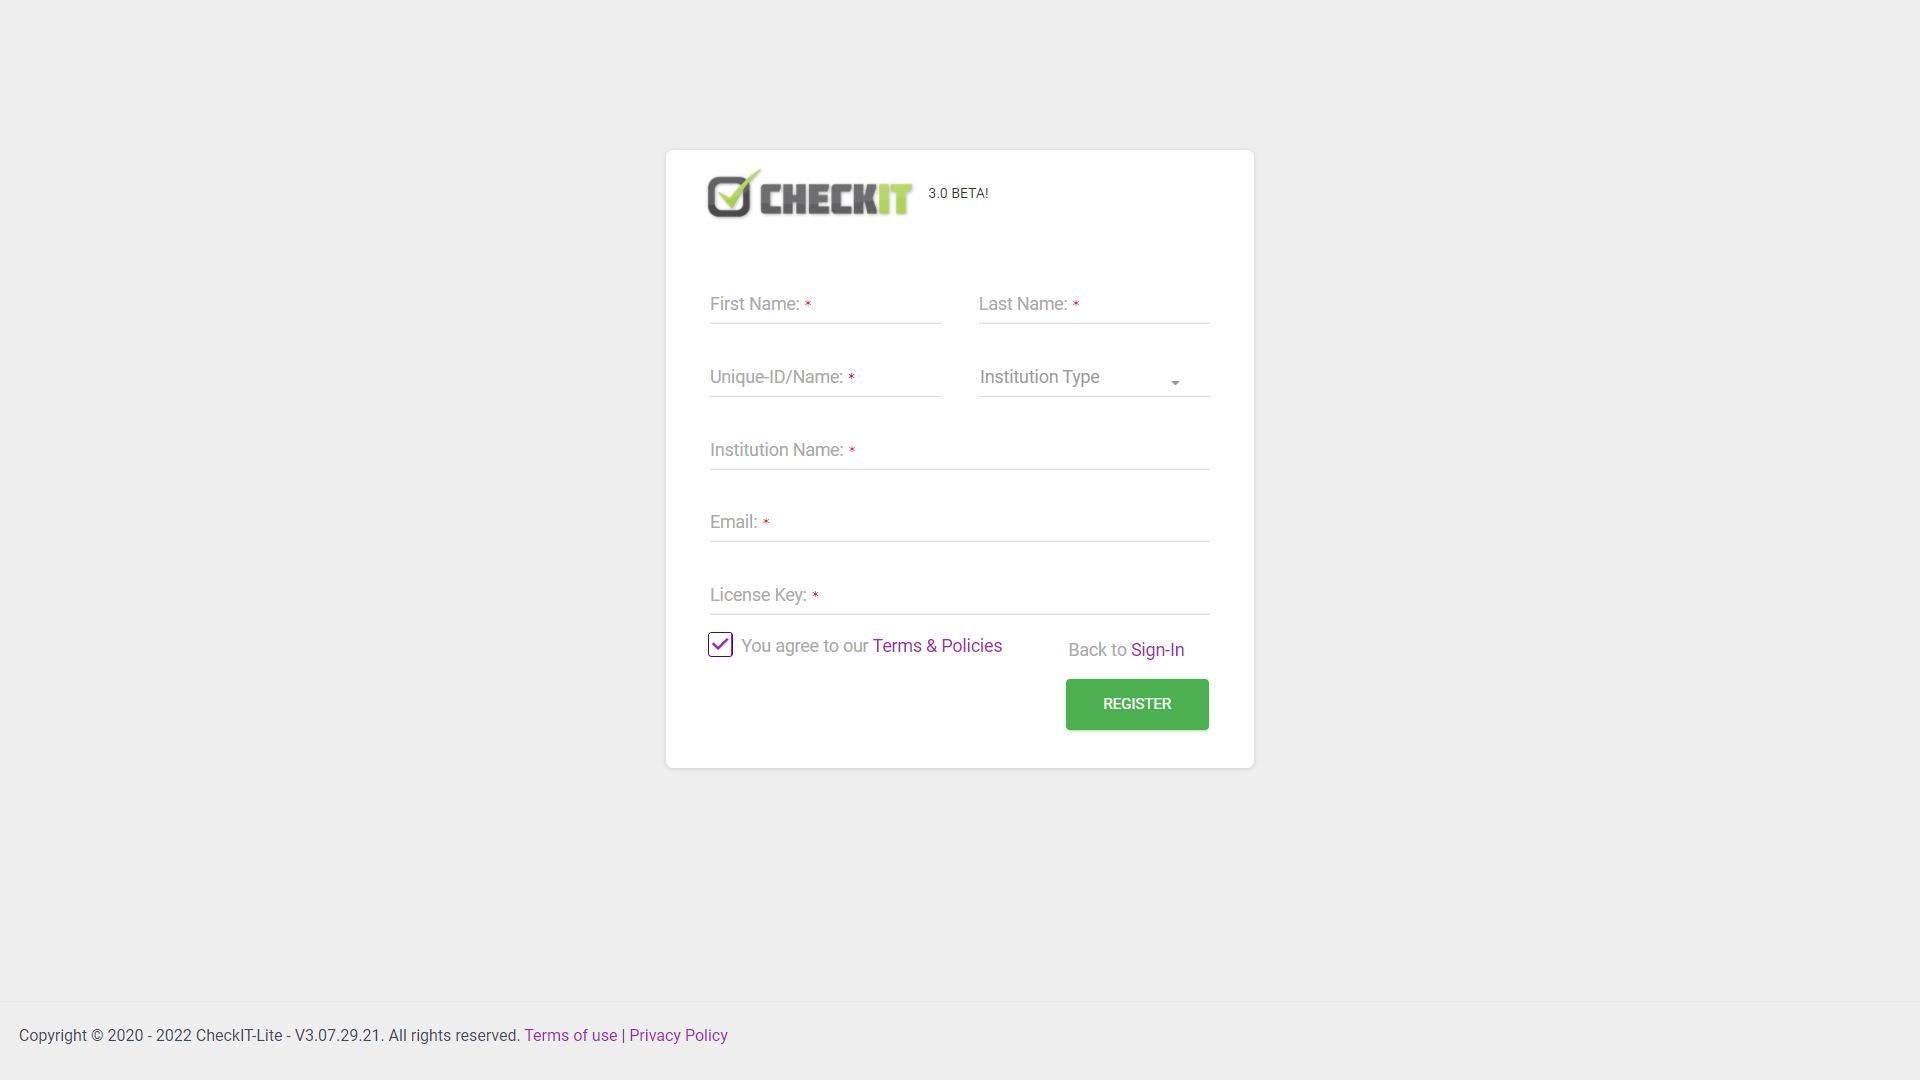
CheckIT Registration page
Sign-In
The Sign-in page can be located via http(s)://{root_domain_name}/auth/signin/{your_unique_id}. If you are using the CheckIT-Lite version, you do not need any Unique ID.
https://thecheckit.com/auth/signin/JISCHOOL
Just like v2, CheckIT v3.0 has two specific account interface namely Examinee and Administrative Interface, and you need only one URL mentioned above to access these interfaces.
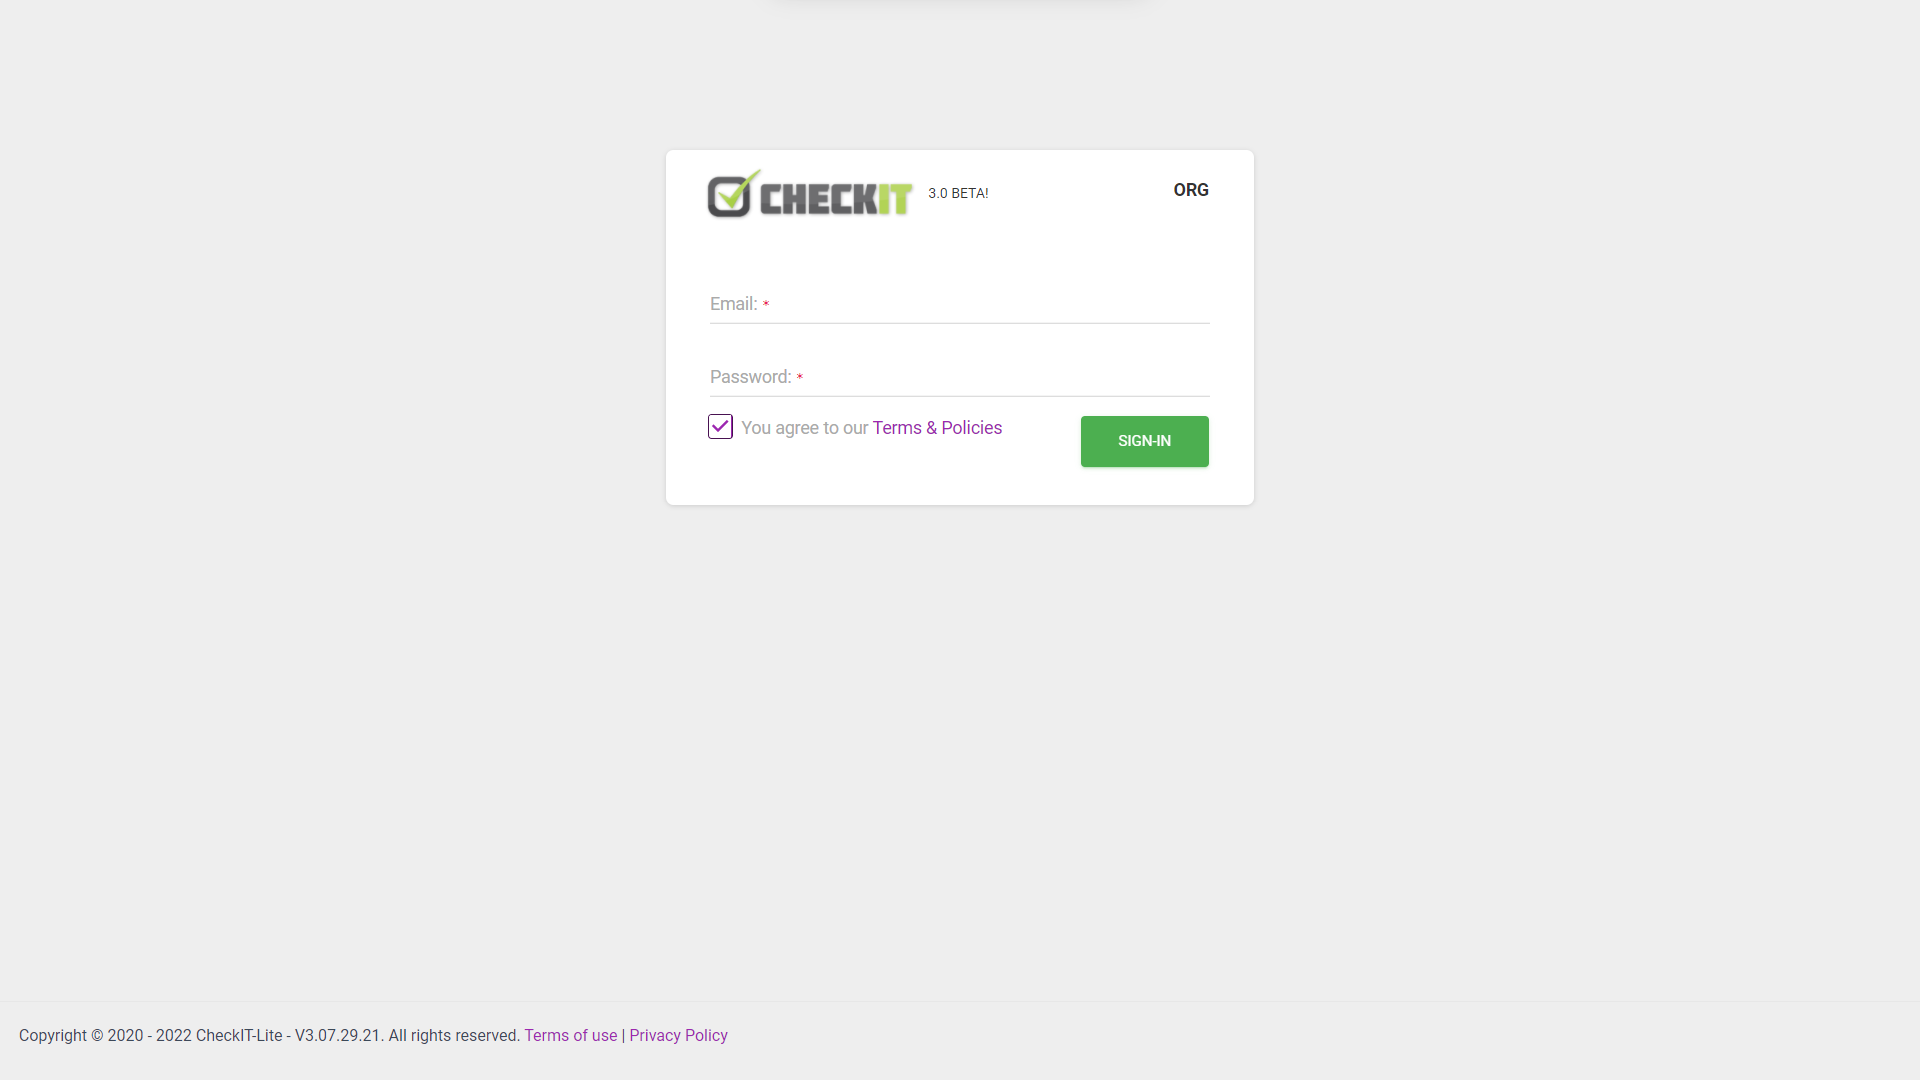
CheckIT Sign-in page
Examinee Interface #back to top
Only users with Examinee Roles are permitted by the system to view this interface.
Dashboard - #back to top
The first page that appears after a successful login is the dashboard. It consist of the Side Menu Bar (where the main menu is located), Top Header Bar (where the Page's Title and Account Drop-Down menu which includes Change Password, Manage Account, Log-out is located) and Main Content Area (where a few stats and business intelligence are displayed).

Examinee Dashboard page
Take Test - #back to top
This module displays the list of all available active demo and real-time test (Completed or Pending).
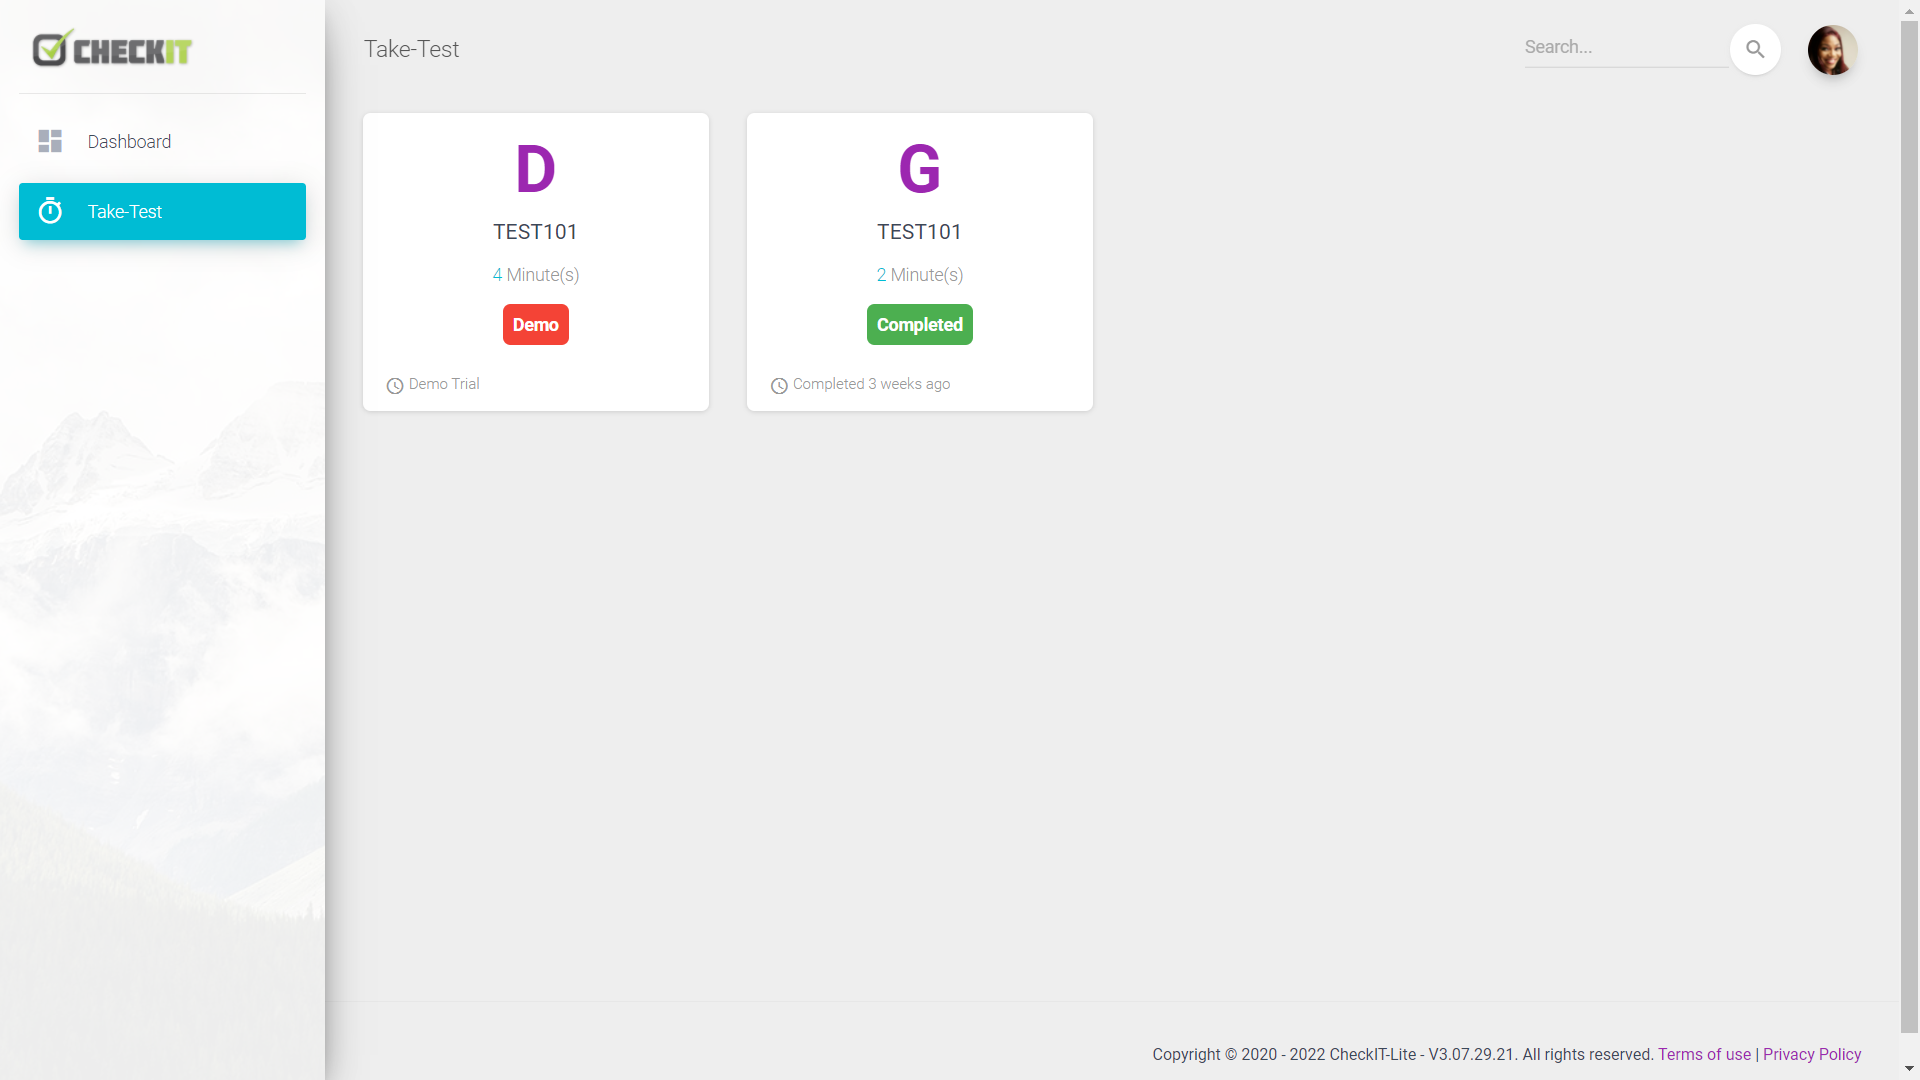
Take Test page
Completed Test - #back to top
When you click on a Completed test list, a modal box slides from the right side of your screen showing summary of the test stats.
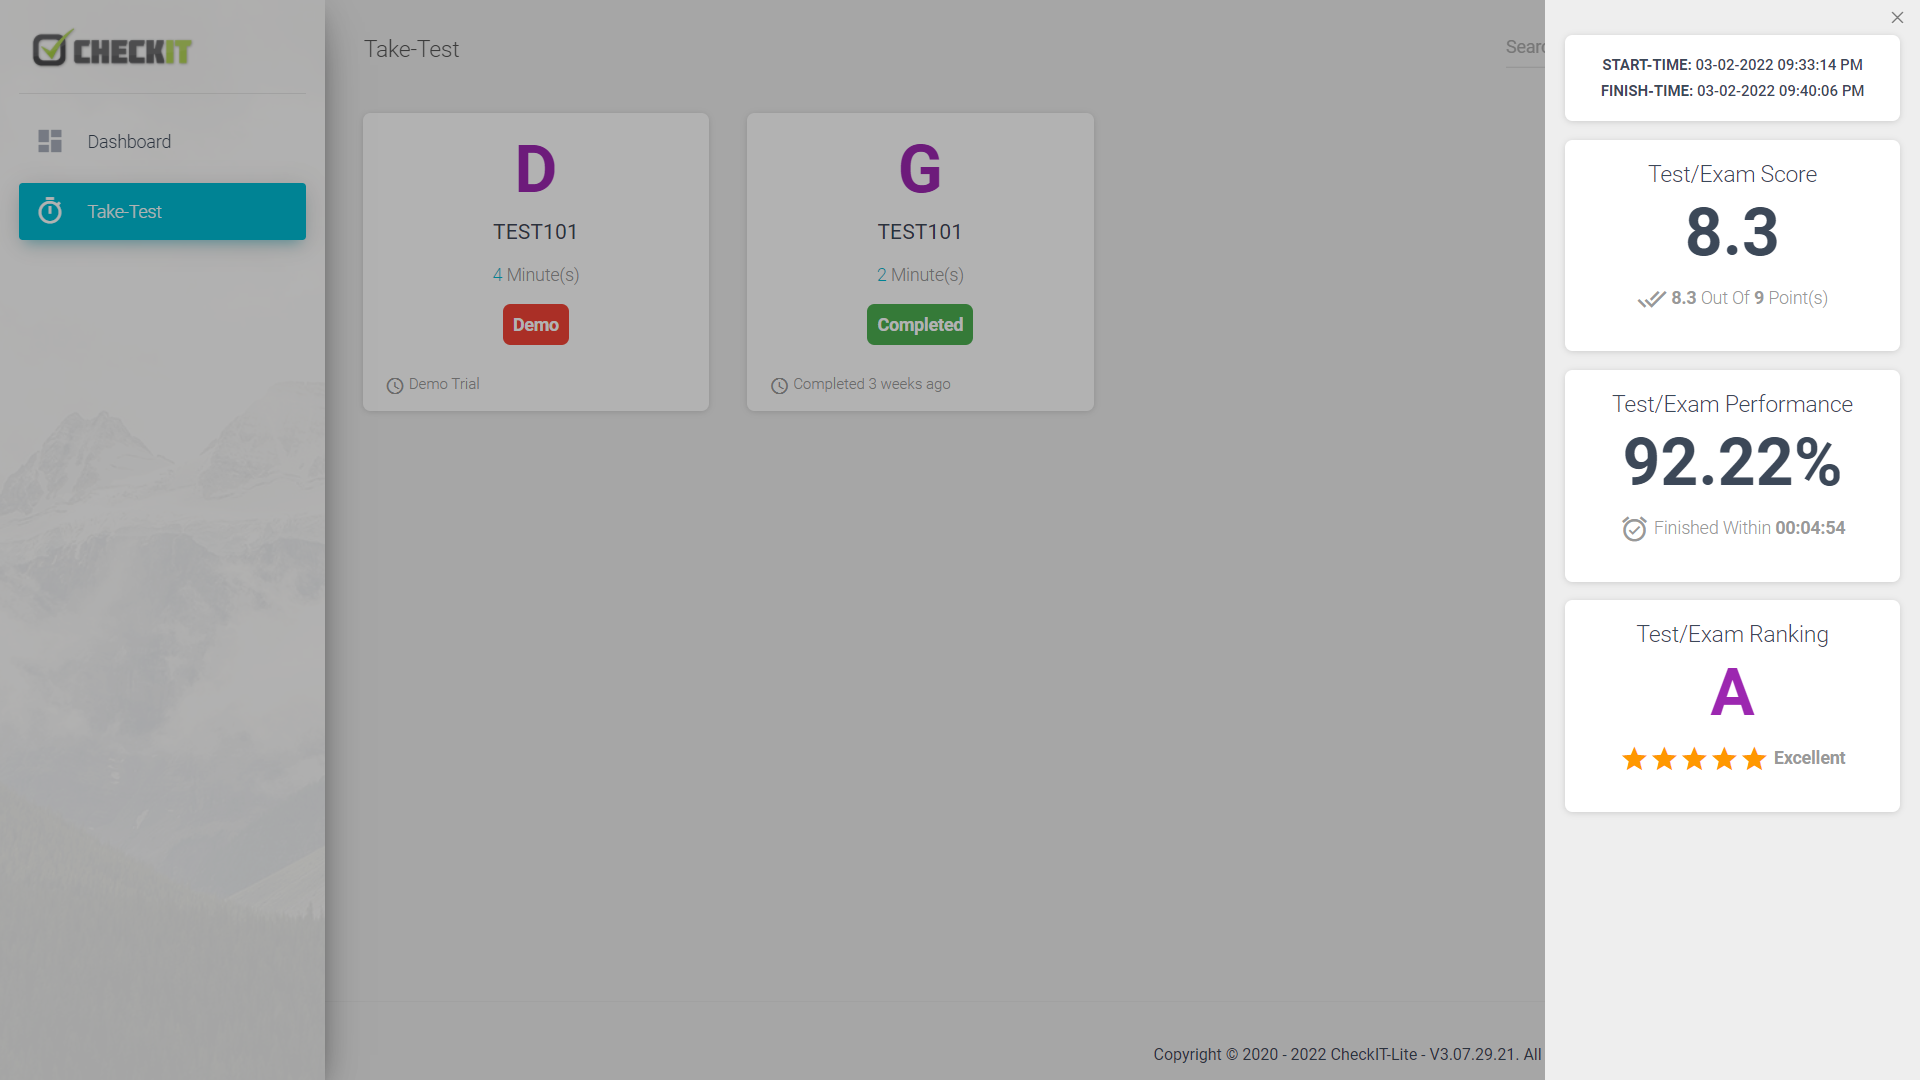
Completed Test page
Test Instructions - #back to top
Examinee(s) will have to read the provided instructions displayed as they would give you quick stats on the test about to be written and information on how to navigate through the testing systems questions; to answer them and submit successfully. Click the Let's CheckIT button at the bottom of the page to proceed to the testing questions or the Select Another Test button at the top right section of the screen to choose another test from the test list.
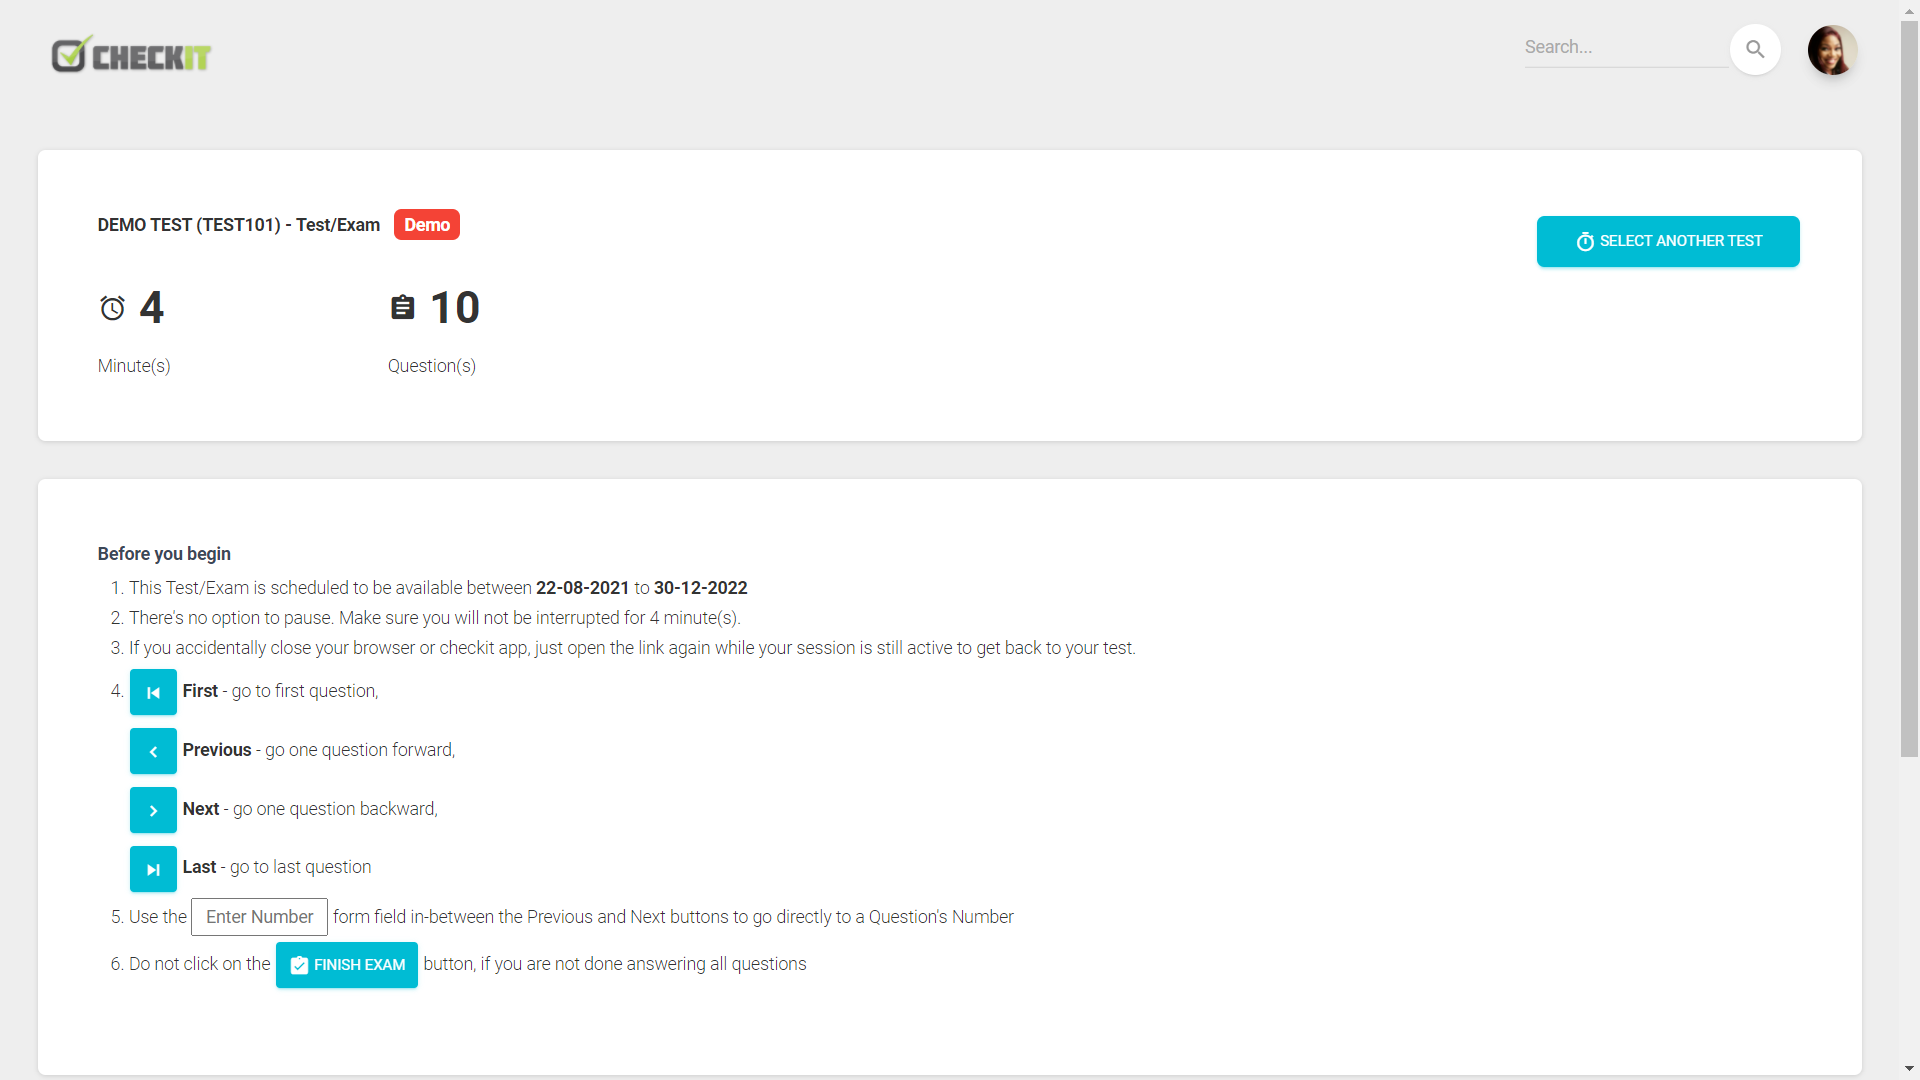
Test Instruction page
Testing - #back to top
With the understanding of the Test Instructions page, navigate through the questions using the buttons on the question navigation panel. A Timer is at the top left conner of the screen to regulate the duration of the test session, while the Finish Test button is at the top right section of the screen page used when done answering the questions (Note: if timer duration expires before the examinee clicks on the Finish Test button, the system submits the test automatically).
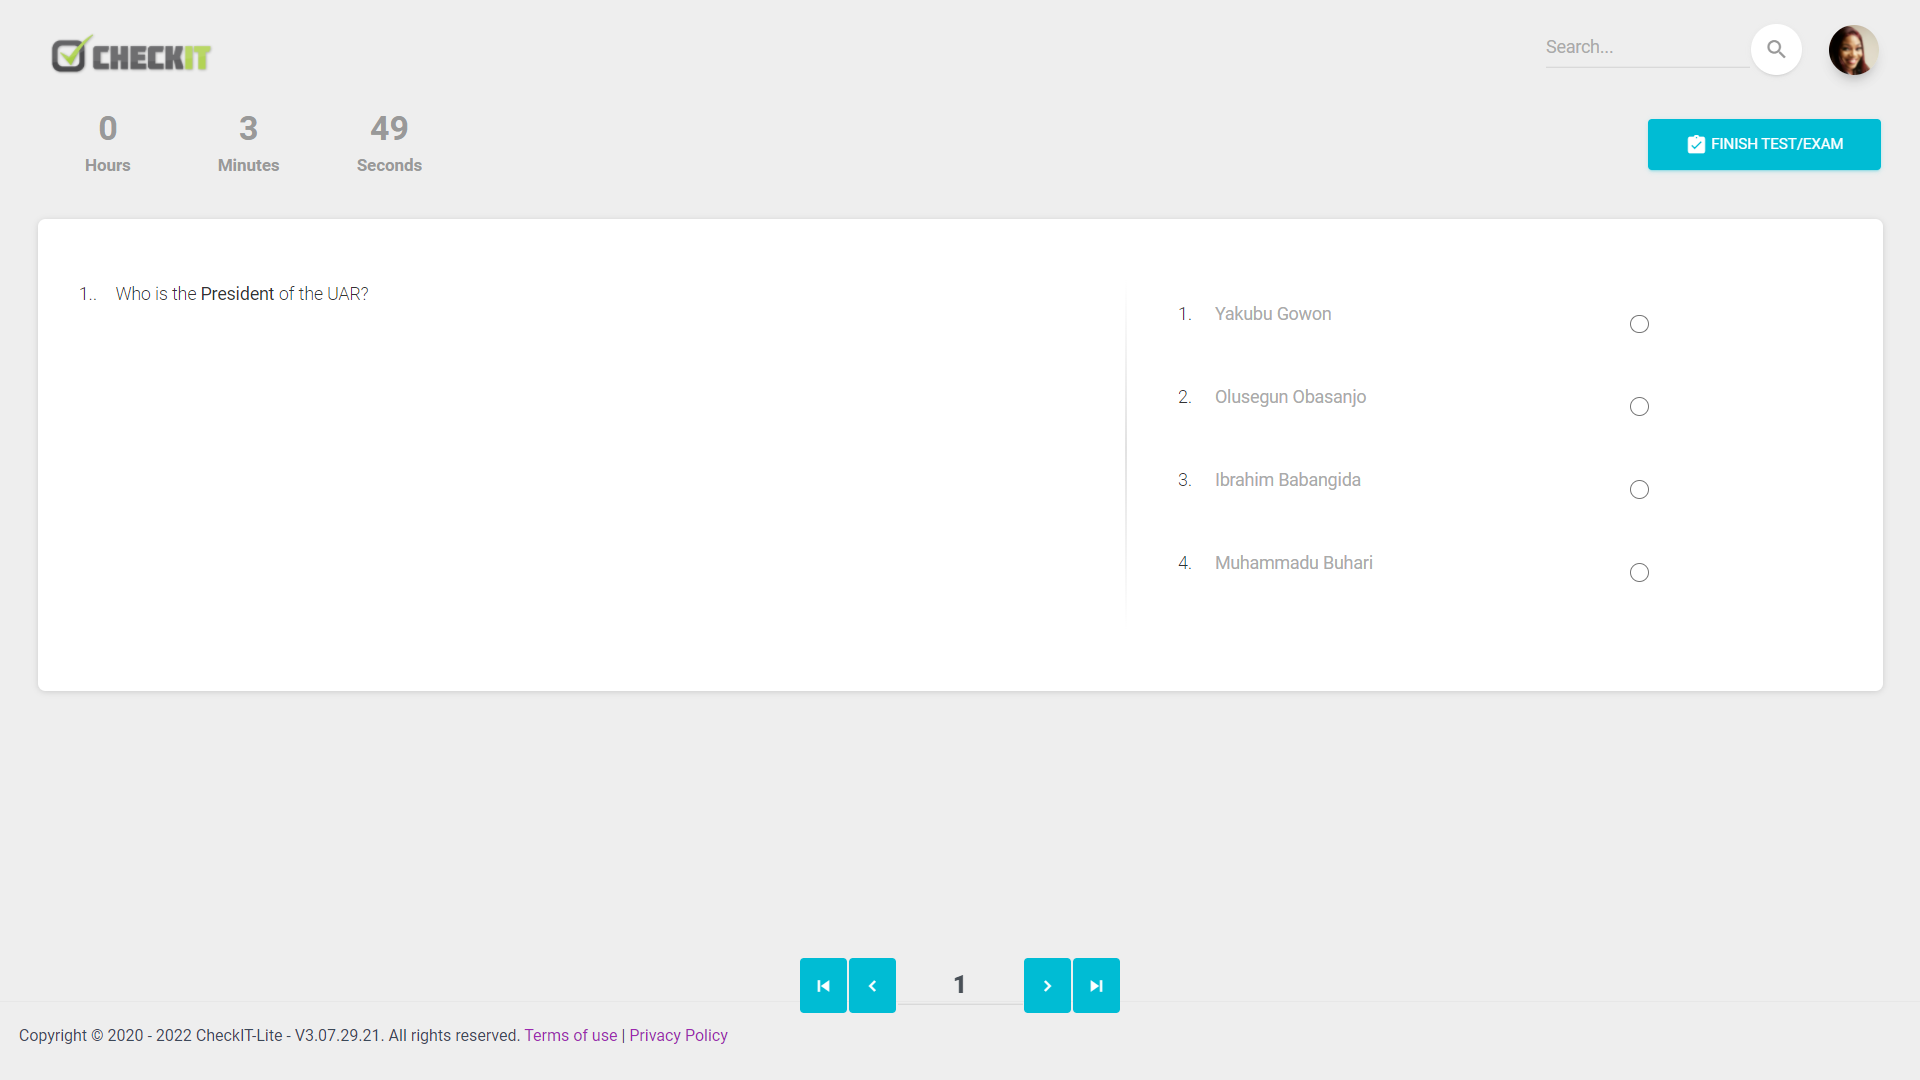
Testing page
Finish Test - #back to top
This is the final page to be seen after successfully submitting your answers using the Finish Test button. It shows the stats the test taken (This can be turned off from the administrative interface).
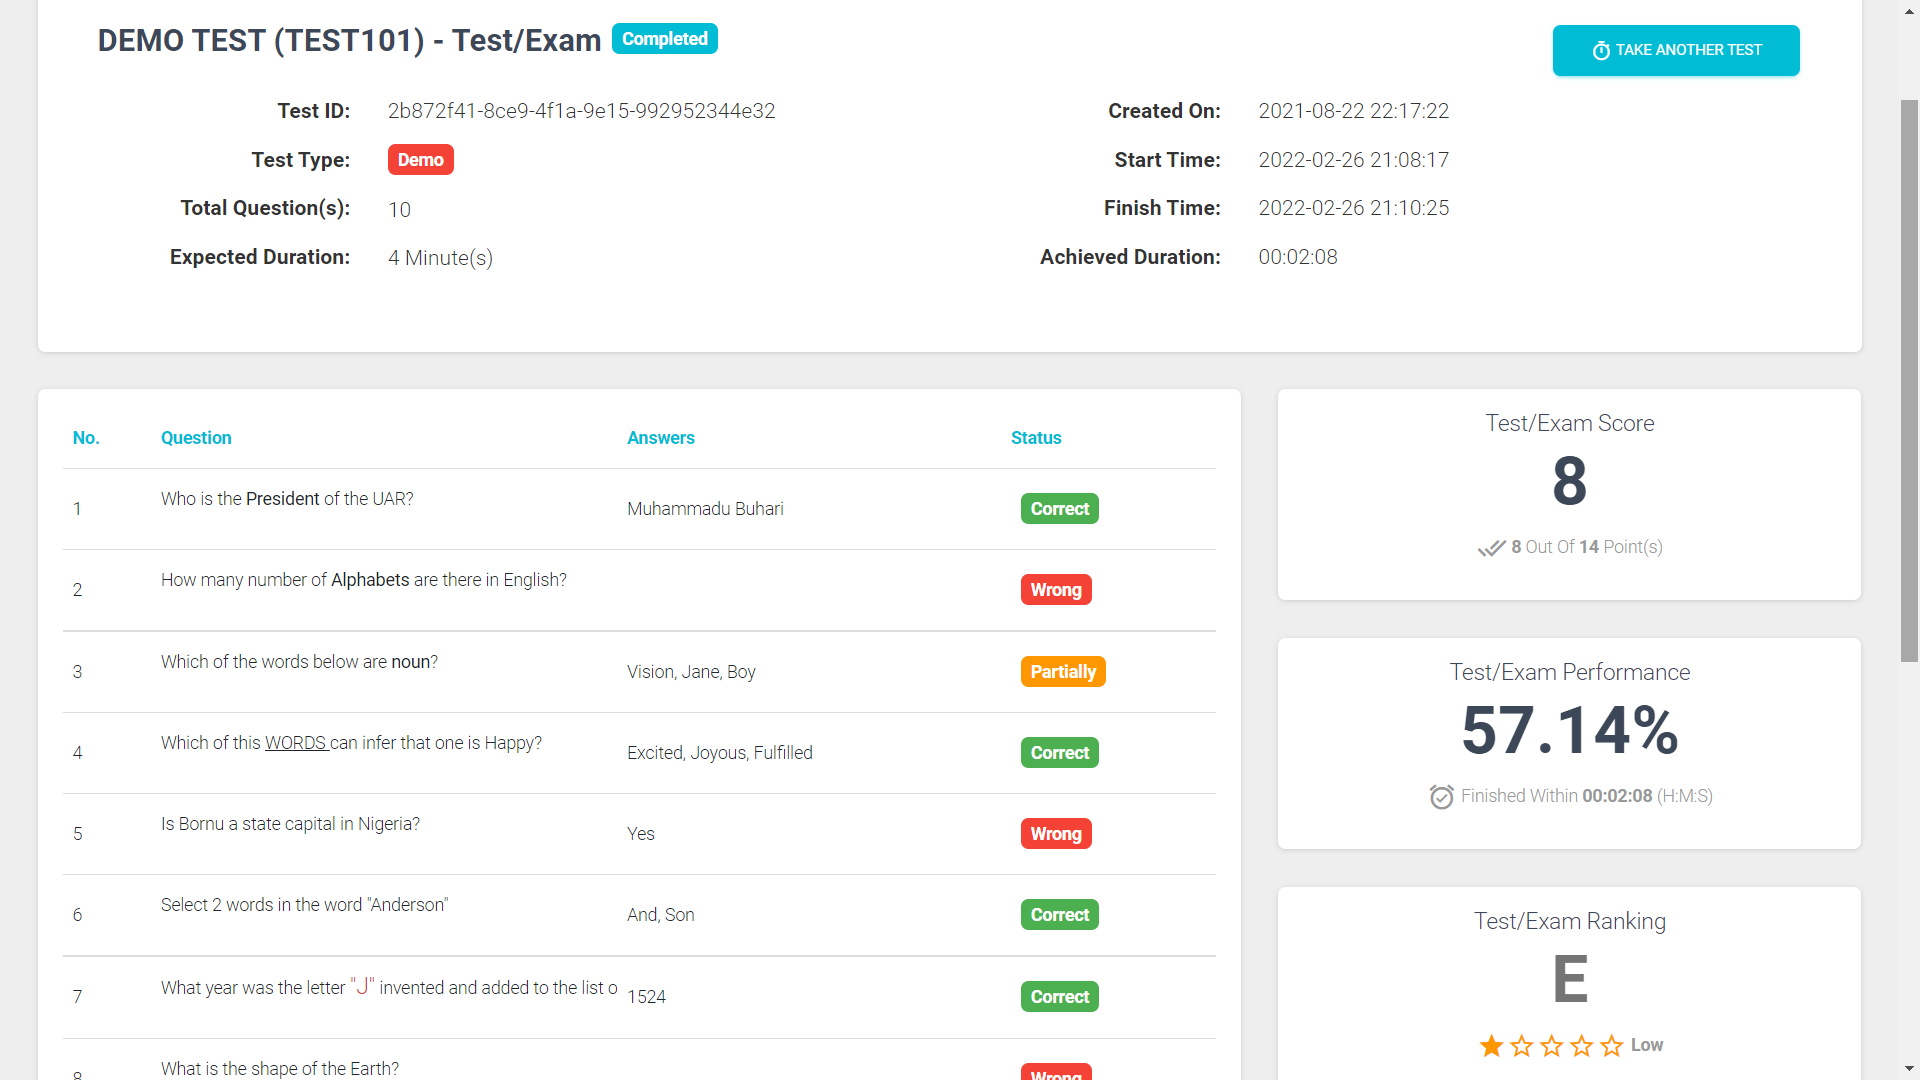
Finish Test page
Administrative Interface #back to top
Only users with Administrative Roles are permitted by the system to view this interface. There are common icon buttons synonymous with this interface used for managing data as listed below:
- edit - Edit (Edit a record).
- delete - Delete (Delete a record).
- sms - Message (Send a message either in an e-mal/sms form to user/group of users).
- - Print (Get the hard-copy print version of the displayed data).
- - CSV (Get the CSV version of the displayed data).
- - PDF (Get the PDF version of the displayed data).
- location_searching - Advance Search (Do some specific search using certain key category).
- arrow_back - Go Back (Takes you to the previous page from the current. Usually located at the top right of the title header of a page).
Dashboard - #back to top
The first page that appears after a successful login is the dashboard. It consist of the Side Menu Bar (where the main menu is located), Top Header Bar (where the Page's Title and Account Drop-Down menu which includes Change Password, Manage Account, Settings, Log-out is located) and Main Content Area (where a few stats and business intelligence are displayed).
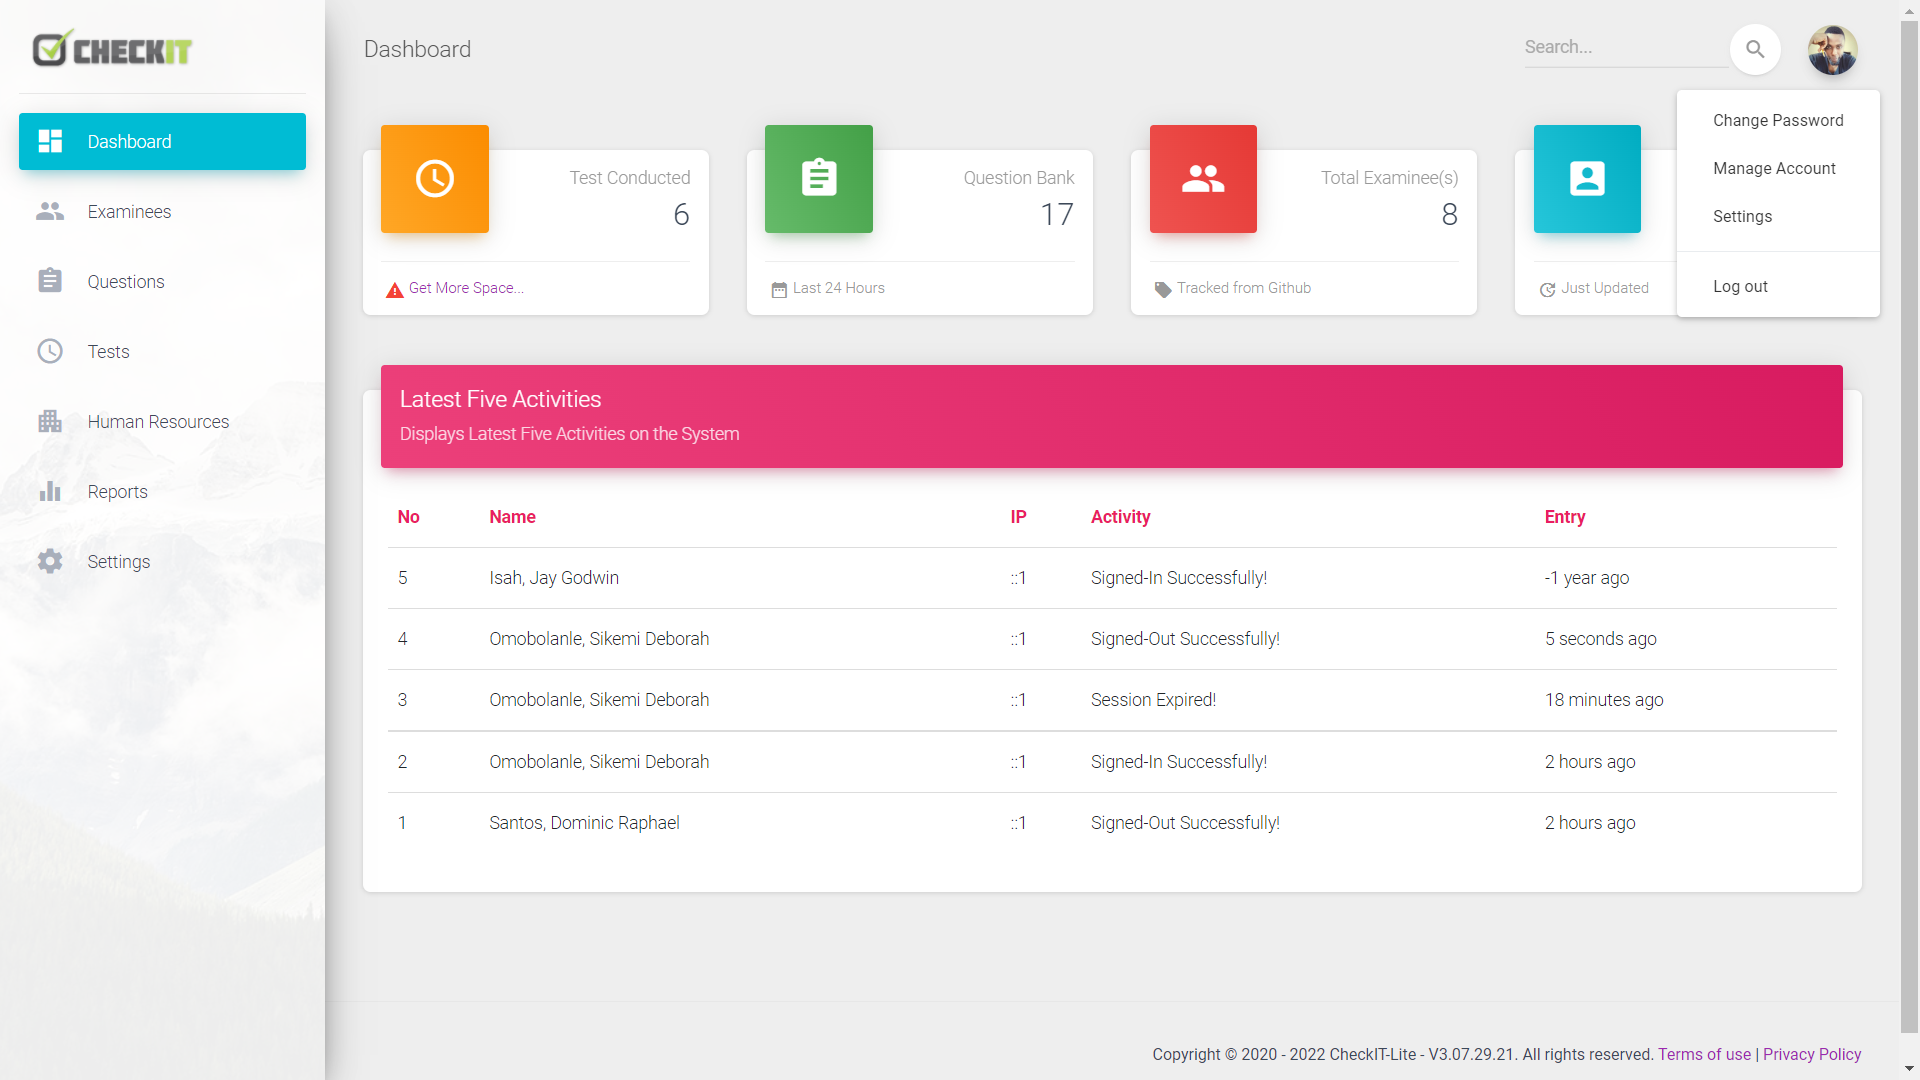
Administrative Dashboard page
Examinees - #back to top
Manages all the Examinee users on the system.
- Add Examinee Create a new Examinee user.
- ● Last Name: Lastname or Surname of examinee.
- ● First Name: First name of examinee.
- ● Registration Number: Examinee ID or Number given by organisation/company/institution.
- ● Email: Email address of examinee.
- ● Phone: Contact phone number of examinee.
- ● Gender: Gender or Sex of examinee (Male or Female).
- ● Category Grouping: Defines the category under which the examinee will be grouped.
- input - Register (Adds examinee to a single or multiple active tests).
Questions - #back to top
Manages all the questions domiciled on the system.
- Add Question Create a new question to add in the question bank.
- ● Select Question Type: There are four (4) types of questions to select from;
- a.) Single-Select Multi-Choice - Select one option out of many options
- b.) Multi-Select Multi-Choice - Select more than one option out of many options
- c.) Closed-End - Provide a fixed answer
- d.) Open-End - Free-style kind of answers are required, like essay writing
- ● Score Point(s): This determines what score point you are giving to the question.
- ● Select Course: The subject/course related to the question been set or created.
- ● Question: The composed question.
- ● Answer: Depending on the type of question selected, the answer field might vary one from another.
- ● Select Question Type: There are four (4) types of questions to select from;
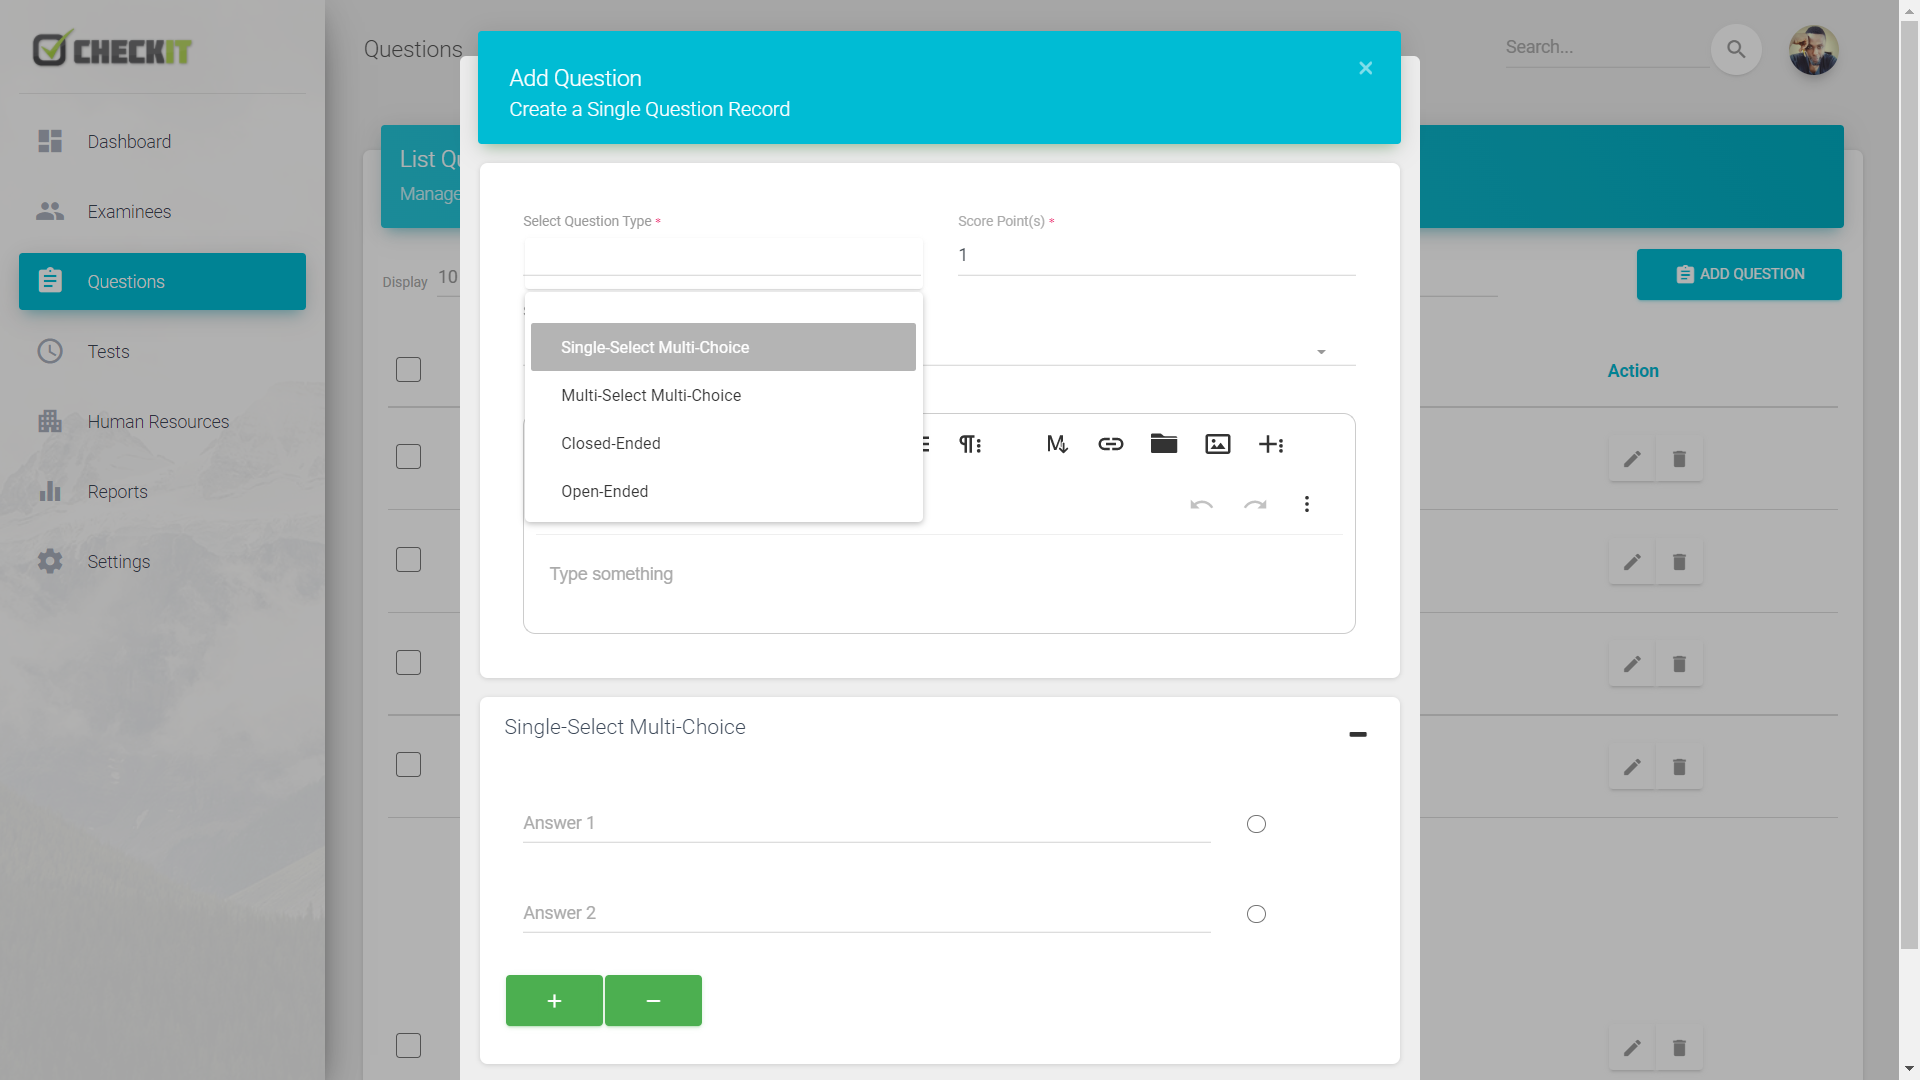
Add Question Modal-box
Tests - #back to top
Manages all test/exam activities on the system.
- Add Test Create a new Test/Exam.
- ● Select Course: The subject/course related to the test/exam been set or created.
- ● Test Name: This determines what score point you are giving to the question.
- ● Select Test Type: Defines if the test/exam is Demo or Real-Time.
- ● Total Question(s): Set the total number of question(s) for the test/exam.
- ● Duration (Mins): Set the duration of the test/exam.
- ● Reminder (Mins): Alerts examinees when duration time is almost up.
- ● Start Time (HH:MM): Defines what time the test/exam starts.
- ● End Time (HH:MM): Defines what time the test/exam ends.
- ● Start Date (mm-dd-yyyy): Defines what date the test/exam starts.
- ● End Date (mm-dd-yyyy): Defines what date the test/exam ends.
- ● Check Attendance: Enable if you want to use a device to checkout examinees after test/exam.
- ● Randomize Questions: Enable to shuffle questions and answer options to be set.
- ● Result Duration Date: If filled, the system will display test grade stats until the date is due.
- ● Select Type of Questions to Include: Select the type of questions you want the system to use for the test/exam; if none of the question types are enabled, the system would select and set all types of questions from the question poll/bank.
- ● Select Questions by Date Range from Question Bank: Select the Start Date and End Date of this feature to make the system select questions from the date range selected.
- ● Negative Marking: Enable to use Negative Marking feature.
- ● Negative Marker: Value here can be decimal or integer, used for Negative Marking as a marker.
- ● Use Custom Grading: Enable if you want to use your custom grade settings created in the Settings module.
- ● Show Grade Stat: Enable to show grade stats of examinee after test/exam.
- ● Test/Exam Success Message: Any text or content here is displayed at the end of a test/exam.
- assignment_ind - Manage Register (Removes examinees from participating in a text).
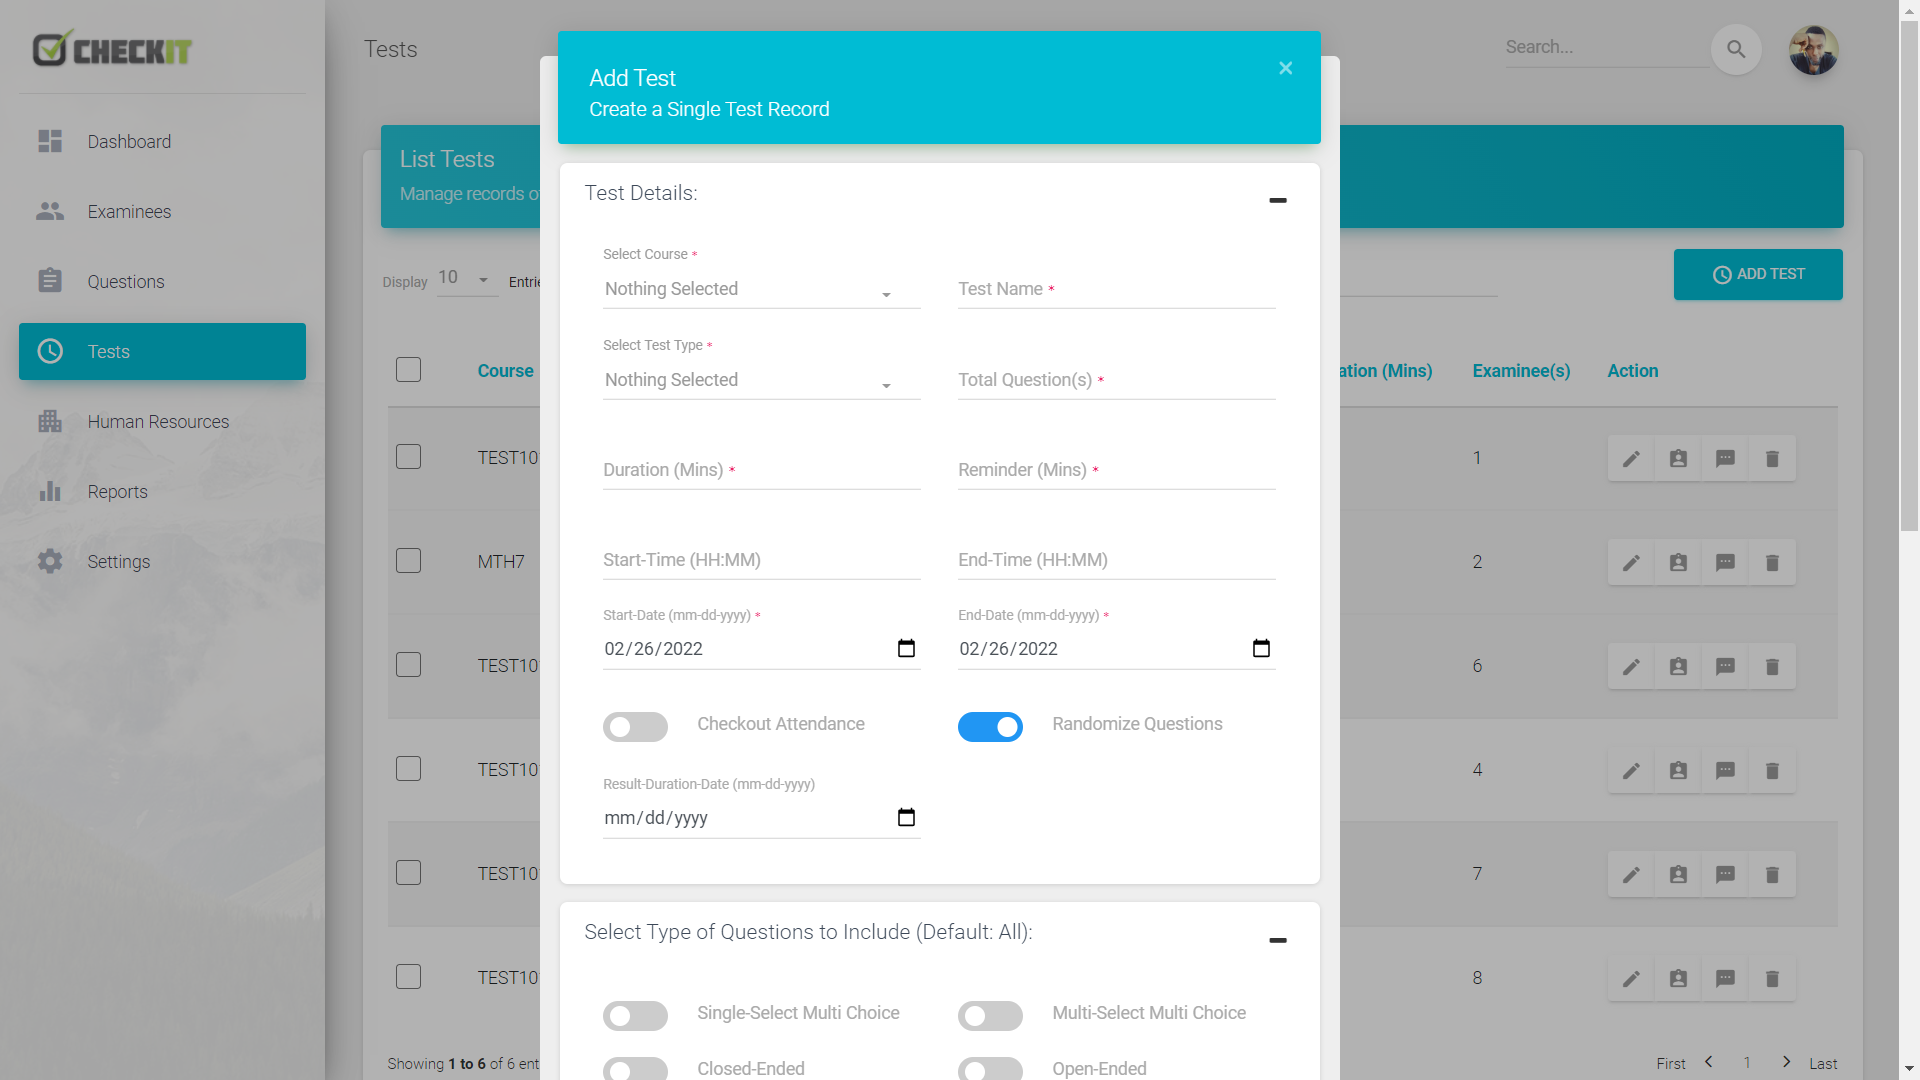
Add/Set/Create Test Modal-box
Human Resources - #back to top
Manages all the Administrative users on the system.
- Staff Details: This option helps Manage all staff information on the system. Click on the Add Staff button to create a staff user.
- ● Role: Define what User Role the staff would operate.
- ● Last Name: Lastname or Surname of staff.
- ● First Name: First name of staff.
- ● Employee Number: Staff ID or Number given by organisation/company/institution.
- ● Email: Email address of staff.
- ● Phone: Contact phone number of staff.
- ● Date of Birth: Birthday of staff.
- ● Date of Joining: Date staff joined the organisation/company/institution.
- ● Gender: Gender or Sex of staff (Male or Female).
- ● Course(s) Designation: When courses are selected here, staff will only be able to operate within the confines of the courses selected else (Optional).
- ● Category Grouping: Defines the category under which the staff will be grouped.
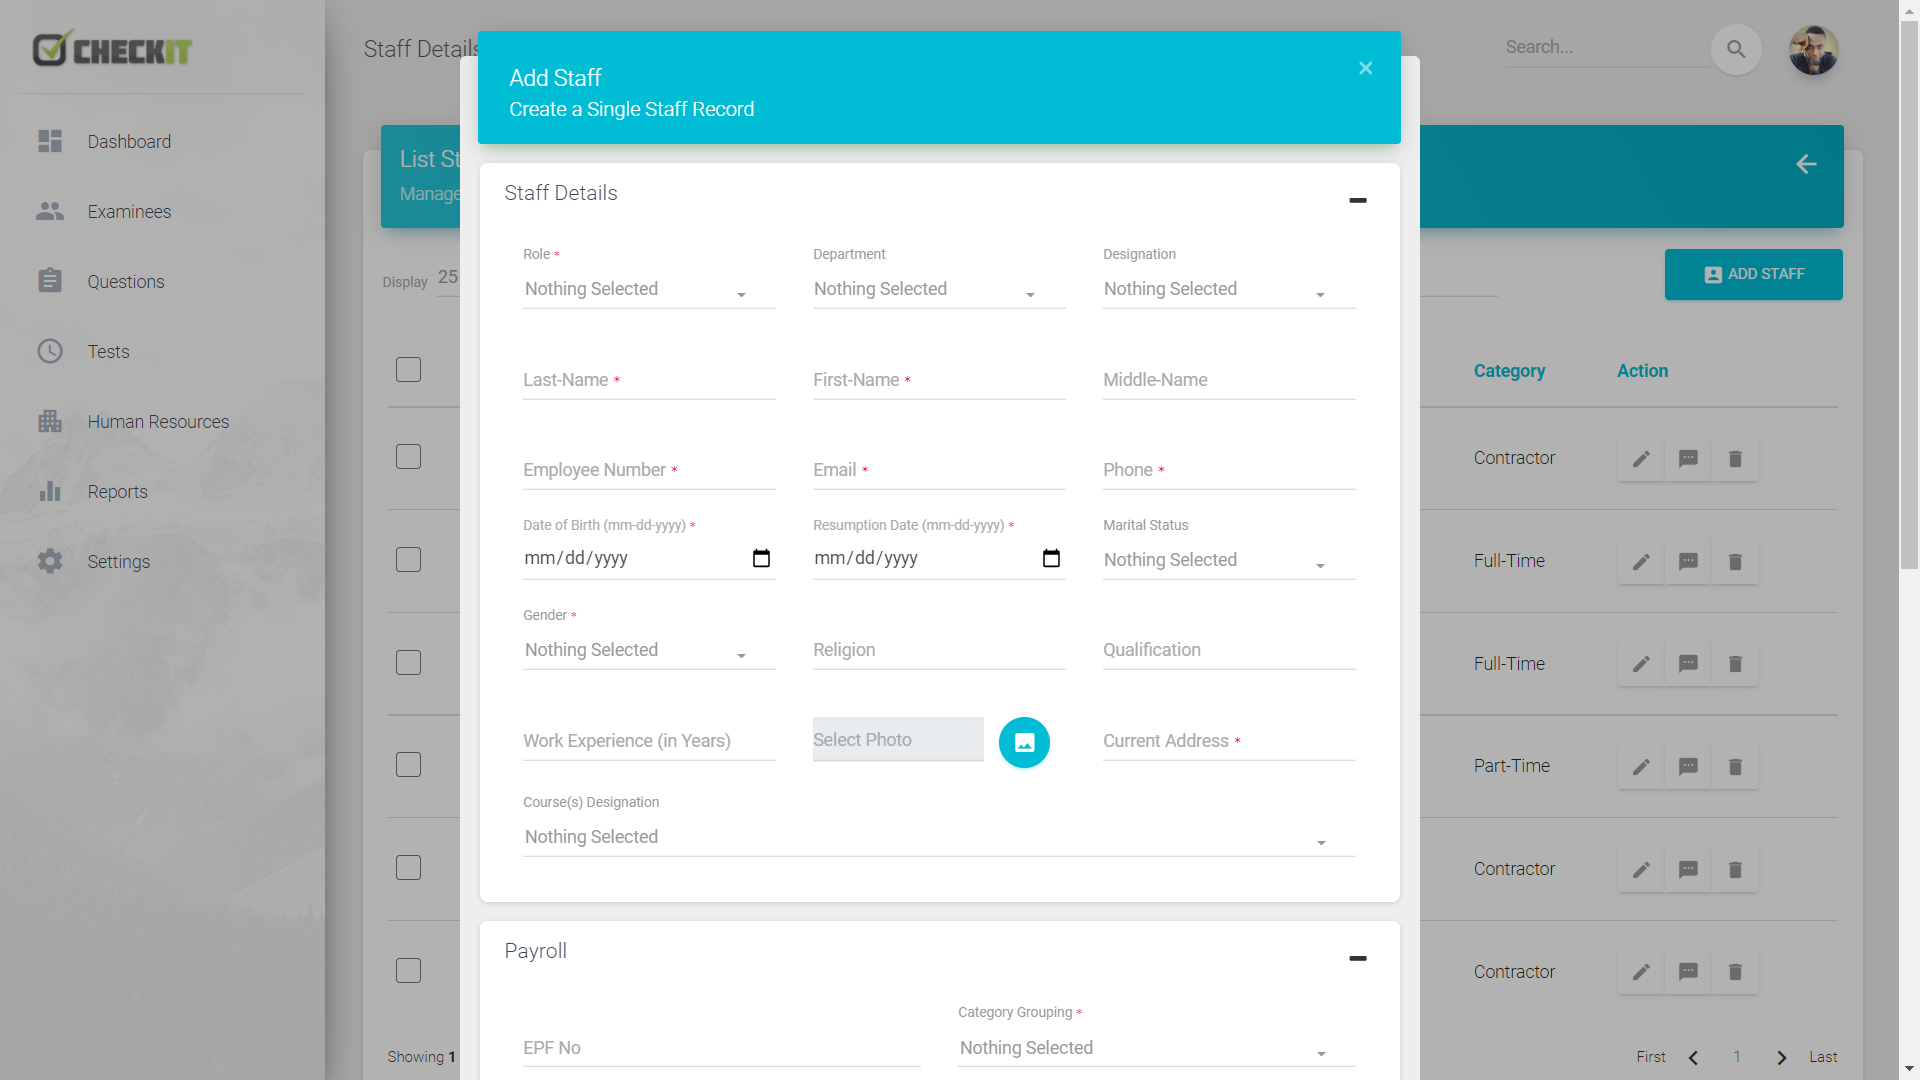
Add Staff Modal-box
Reports - #back to top
Displays tabular and visual reports of various modules.
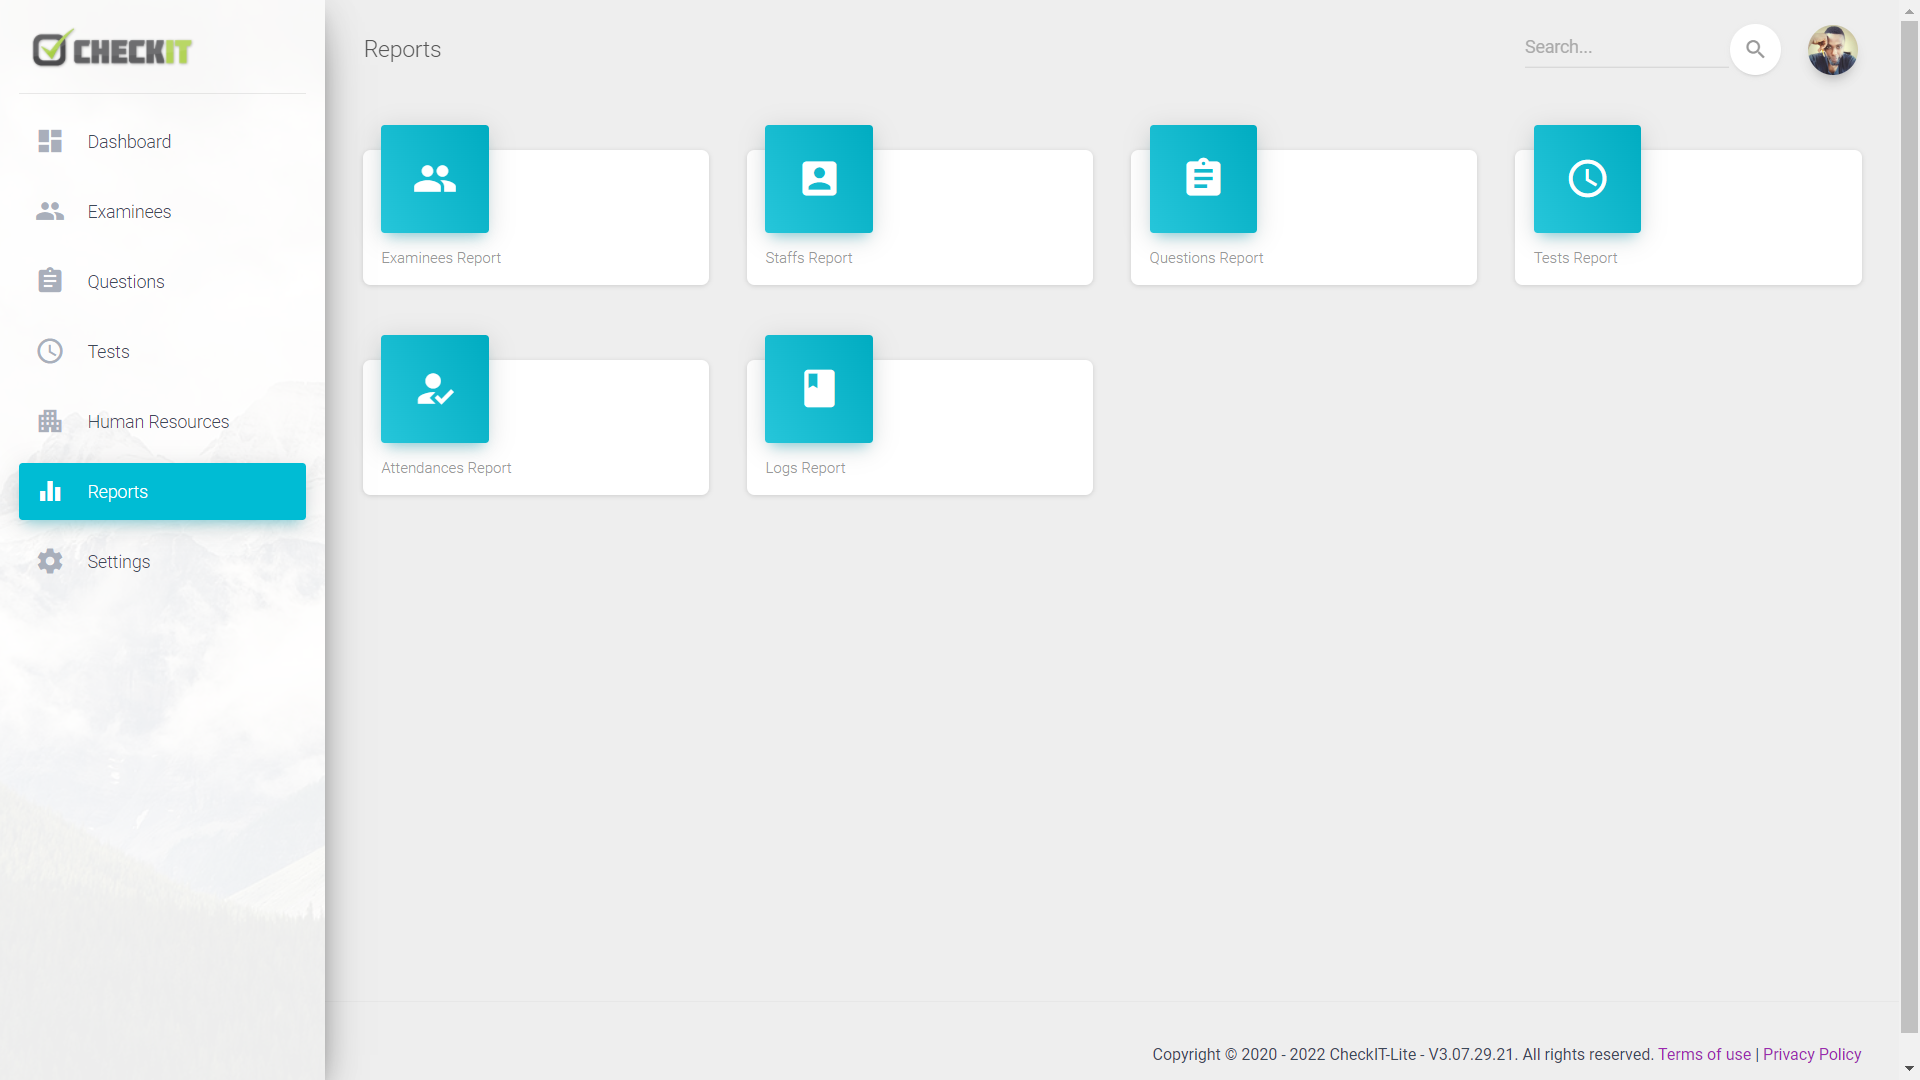
Reports page
- Examinees Report: Shows reports of all examinees.
- Staffs Report: Shows reports of all staffs.
- Questions Report: Shows reports of all questions.
- Tests Report: Shows reports of all set test.
- Attendances Report: Shows reports of Examinees attendance to set test.
- how_to_reg - Take Attendance (This button helps view Examinees Attendance List designated to take the selected test).
- visibility - View (This button helps display the Examinee's information on a modal box).
- pause - Pause Time (This button helps pause time of Examinee's test in progress).
- more_time - Add Time (This button helps add time to Examinee's test in progress).
- person_remove - Remove (This button helps remove Examinee from Attendance List of a specific test).
- grading - Grade Open-End Answers (This buton helps grades Open-End questions answered by Examinee).
- Log Report: Shows reports of all log activities.
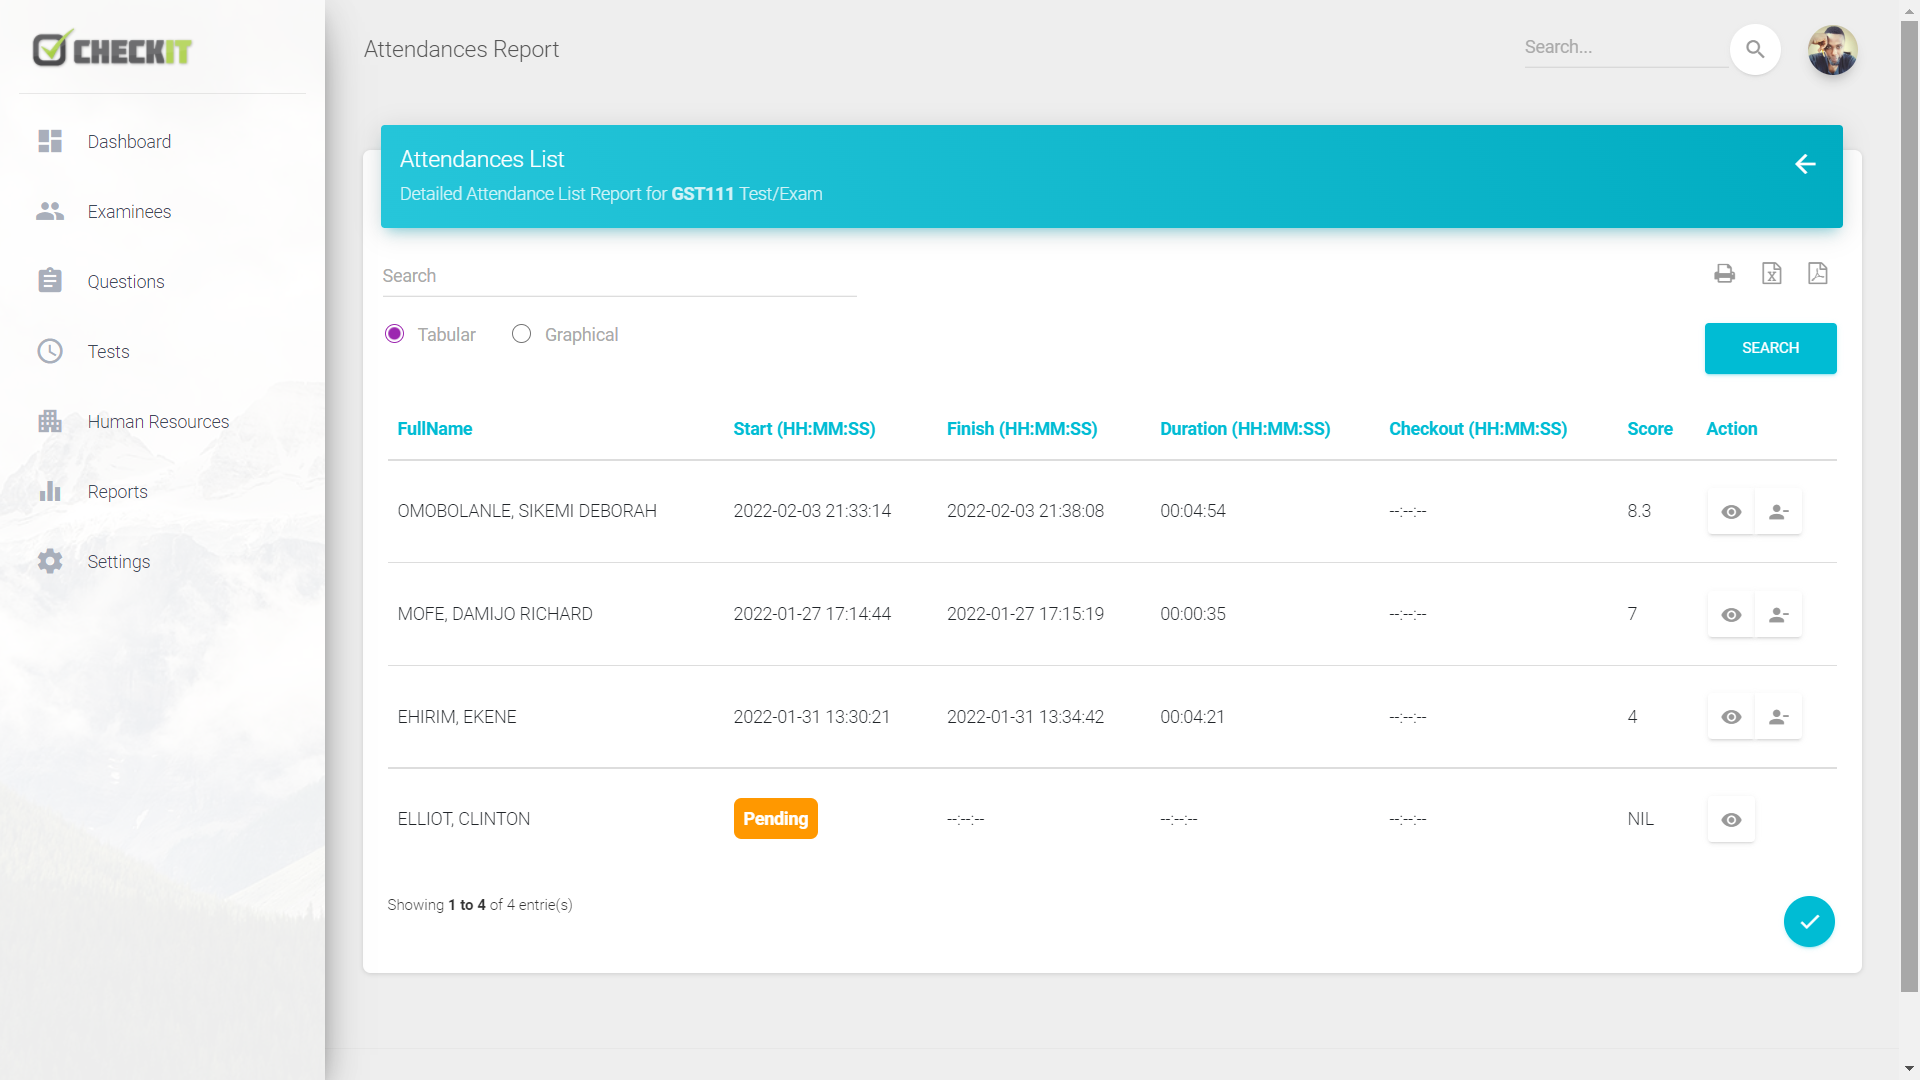
Attendance List Report page
Settings - #back to top
The settings section holds the modules that sets configurations used by CheckIT to function properly according to your desired settings.

Settings page
- System Settings: Use this to view/set default settings for CheckIT system.
- ● Unique ID/Name: This is the Unique name used to generate your URL Sign-In page for your users (It cannot be changed).
- ● Institution Type: Displays the type of organisation/company/institution.
- ● Institution Name: Name of organisation/company/institution.
- ● Email: E-mail of organisation/company/institution.
- ● Phone: Contact phone number of organisation/company/institution.
- ● Registration Number: organisation/company/institution's Registration number if any.
- ● Country: Country of location.
- ● Address: Current official address of location.
- ● Default Row Per Page: Set how many rows of data per page to be displayed on a tabular view of information; default is 25.
- ● Default Template: Set template to use; default is "Material".
- ● Select Logo: Select logo representation to use in place of the default CheckIT logo (Note: Should have height not more than 45px, and format could be png/jpg/gif).
- ● Select Your Theme: Select a theme color of your choice; default is "Green Land".
- ● License Key: Displays license key for your CheckIT product (It cannot be changed).
- Manage Account: Update your personal/profile account details here. This page is also available on the Examinee Interface
- Category Grouping: Helps set or create categories used to group users. Add Group
- ● Group Type: Select which category name you wish to add a new group to.
- ● Select Base-Name: If left blank, the system would use the Group name provided as a Primary or Base-Name for the group created else, the Group name would be used as a Sub-Name for the Base-Name selected..
- ● Group Code: Code name for the group created.
- ● Group Name: Name of the group created.
- ● Description: Description of group created.
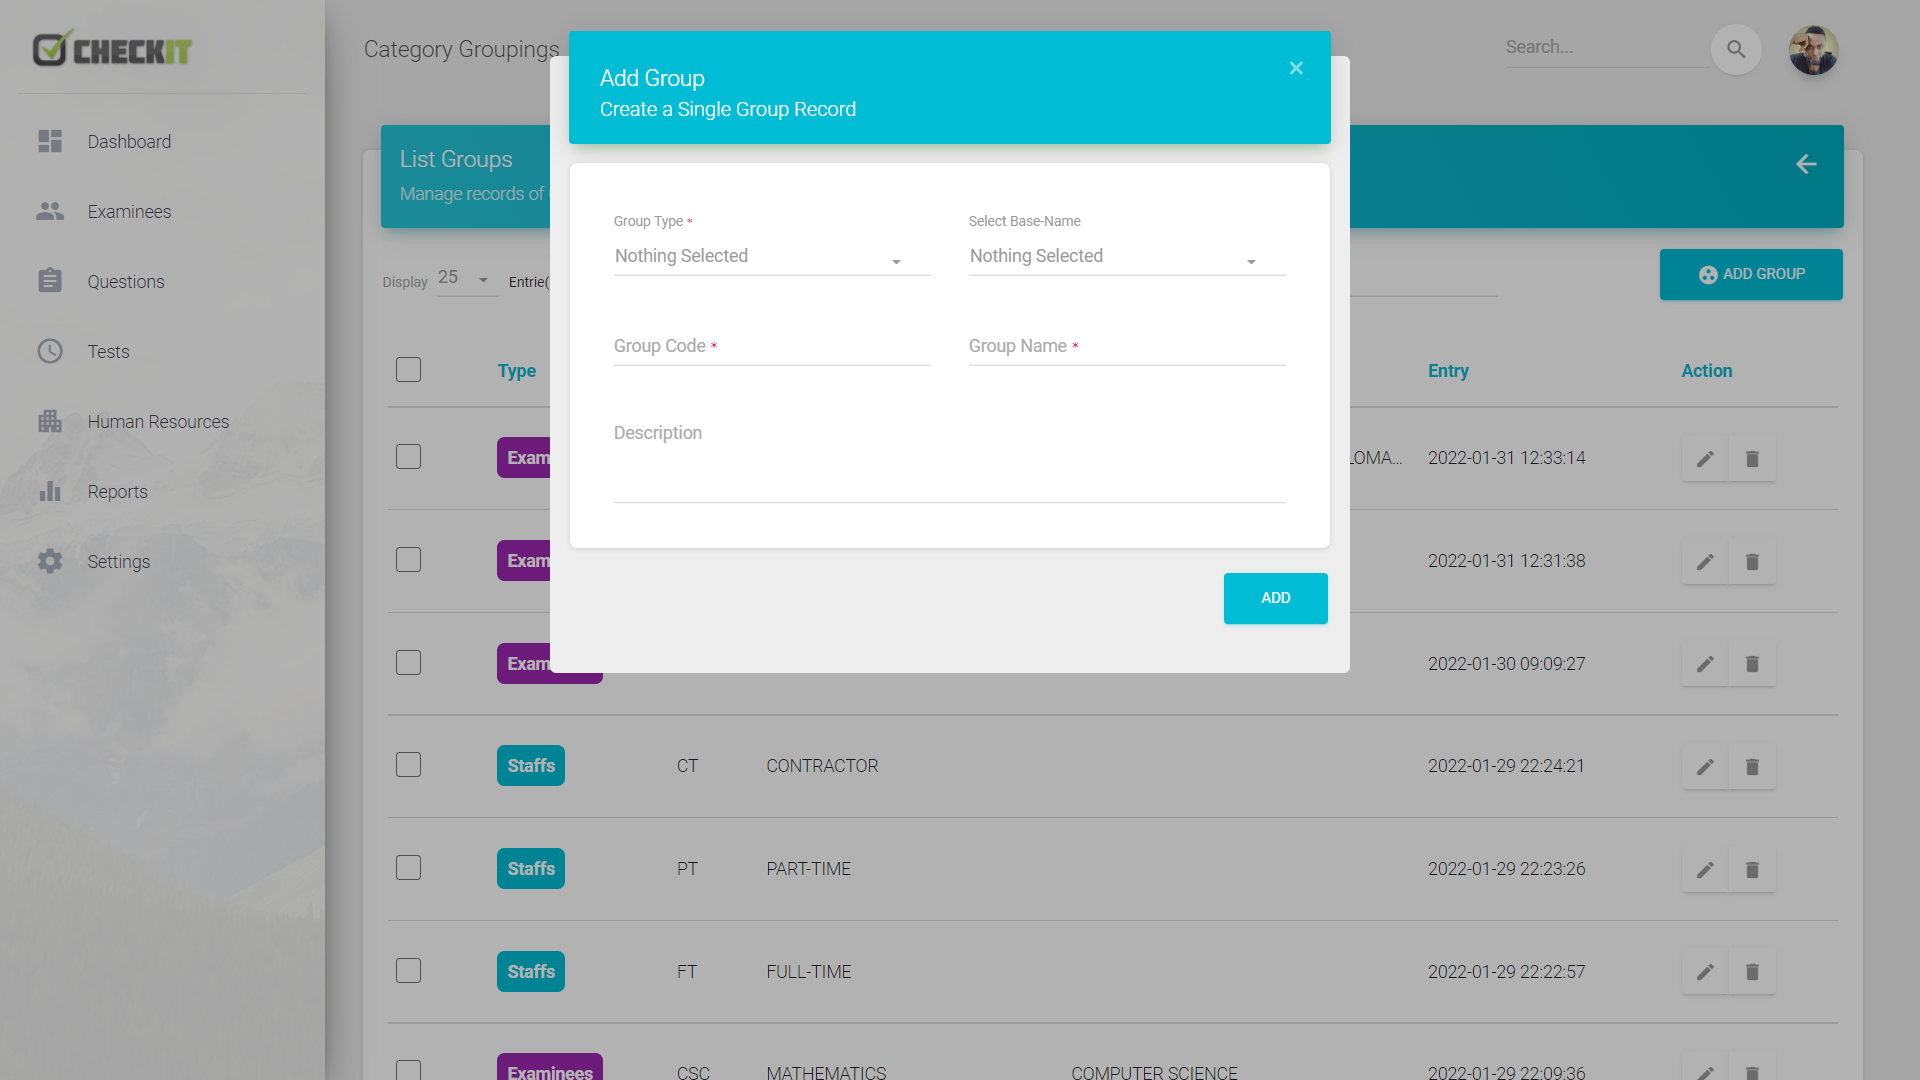
Add Category group Modal-box
- Manage Modules: Enable or Disable the visibility of a module
- Roles & Permissions: Helps set or create custom User Roles and add your desired Permissions for the role created. Add Role
- ● Name: Name of User Role created.
- ● Description: Description of User Role created.
- vpn_key - Permission (Set permissions to User Role created).

Add Permissions to User Role Modal-box
- Courses: Helps set or create list of courses used in setting test and adding questions. Add Course
- ● Code: Code of course.
- ● Name: Name of course.
- Bulk Upload: Helps upload data in bulk. Below are steps to guide you on how to upload records in bulk;
- ● Select Upload Option: On the modal box, select the bulk Upload option;
- a.) Examinees
- b.) Staffs
- c.) Questions
- ● Separator: If option is 'questions', you will either have to provide your own Option Separator or use the default which is ",".
- - Download the sample CSV file that would guide you on the syntax to fill your data to be used in populating the database (use spreadsheet apps like microsoft excel).
- ● Attach CSV: Attach your already filled CSV file.
- ● Import: Click on the import button (If upload is successful, a notification would be displayed that yuor bulk upload was successful).
- ● How to Prepare your Question CSV Sample Sheet. .
- a.) course_code - Holds the subject/course Code of the question.
- b.) type - Holds the key value for the type of question: 1 - Single Choice Multi Question, 2 - Multi Choice Multi Question, 3 - Closed End Question, 4 - Open End Question.
- c.) score - Holds the expected score value for the question.
- d.) question - Holds the question.
- e.) answer_stack - Holds the answer options seperated by either your provided separator or the system's default which is ",", having an Order Value starting from 0,1,2... for each option entered (only provide for SIngle or Multi Choice Questions).
- f.) is_correct - Holds the correct answer Order Value of either options seperated by either your provided separator or the system's default which is ",", or just a string for closed end questions eg.
* Single Choice Multi Question - (Takes only one Order Value ranging from 0 to total number of answer_stack - 1)
* Multi Choice Questions - (Specify the correct answer_stack Order Values separated by provided separator ranging from 0 to total number of answer_stack - 1 example; "0,2,3" or like "0|2|4")
* Closed End Questions - (example; numbers like "1524" or text like "Glory").
                                                course_code         type        score       question                    answer_stack                is_correct
                                                ________________________________________________________________________________________________________________
                                                ANT211              2           1           True or False               Chickens can fly,           2,3
                                                                                                                        Birds have four legs,
                                                                                                                        Humans are Intelligent,
                                                                                                                        Snakes are reptiles,
                                                                                                                        Goats live in the sky
                                                ________________________________________________________________________________________________________________
                                                TEST101		        3	        1	        Nigeria Civil war started				   	            1967
                                                ________________________________________________________________________________________________________________
                                                TEST101		        1	        1	        Is 5 a prime number?	   	Yes, No				        0
Note: each data provided occupy a cell, including the answer_stack with separators.
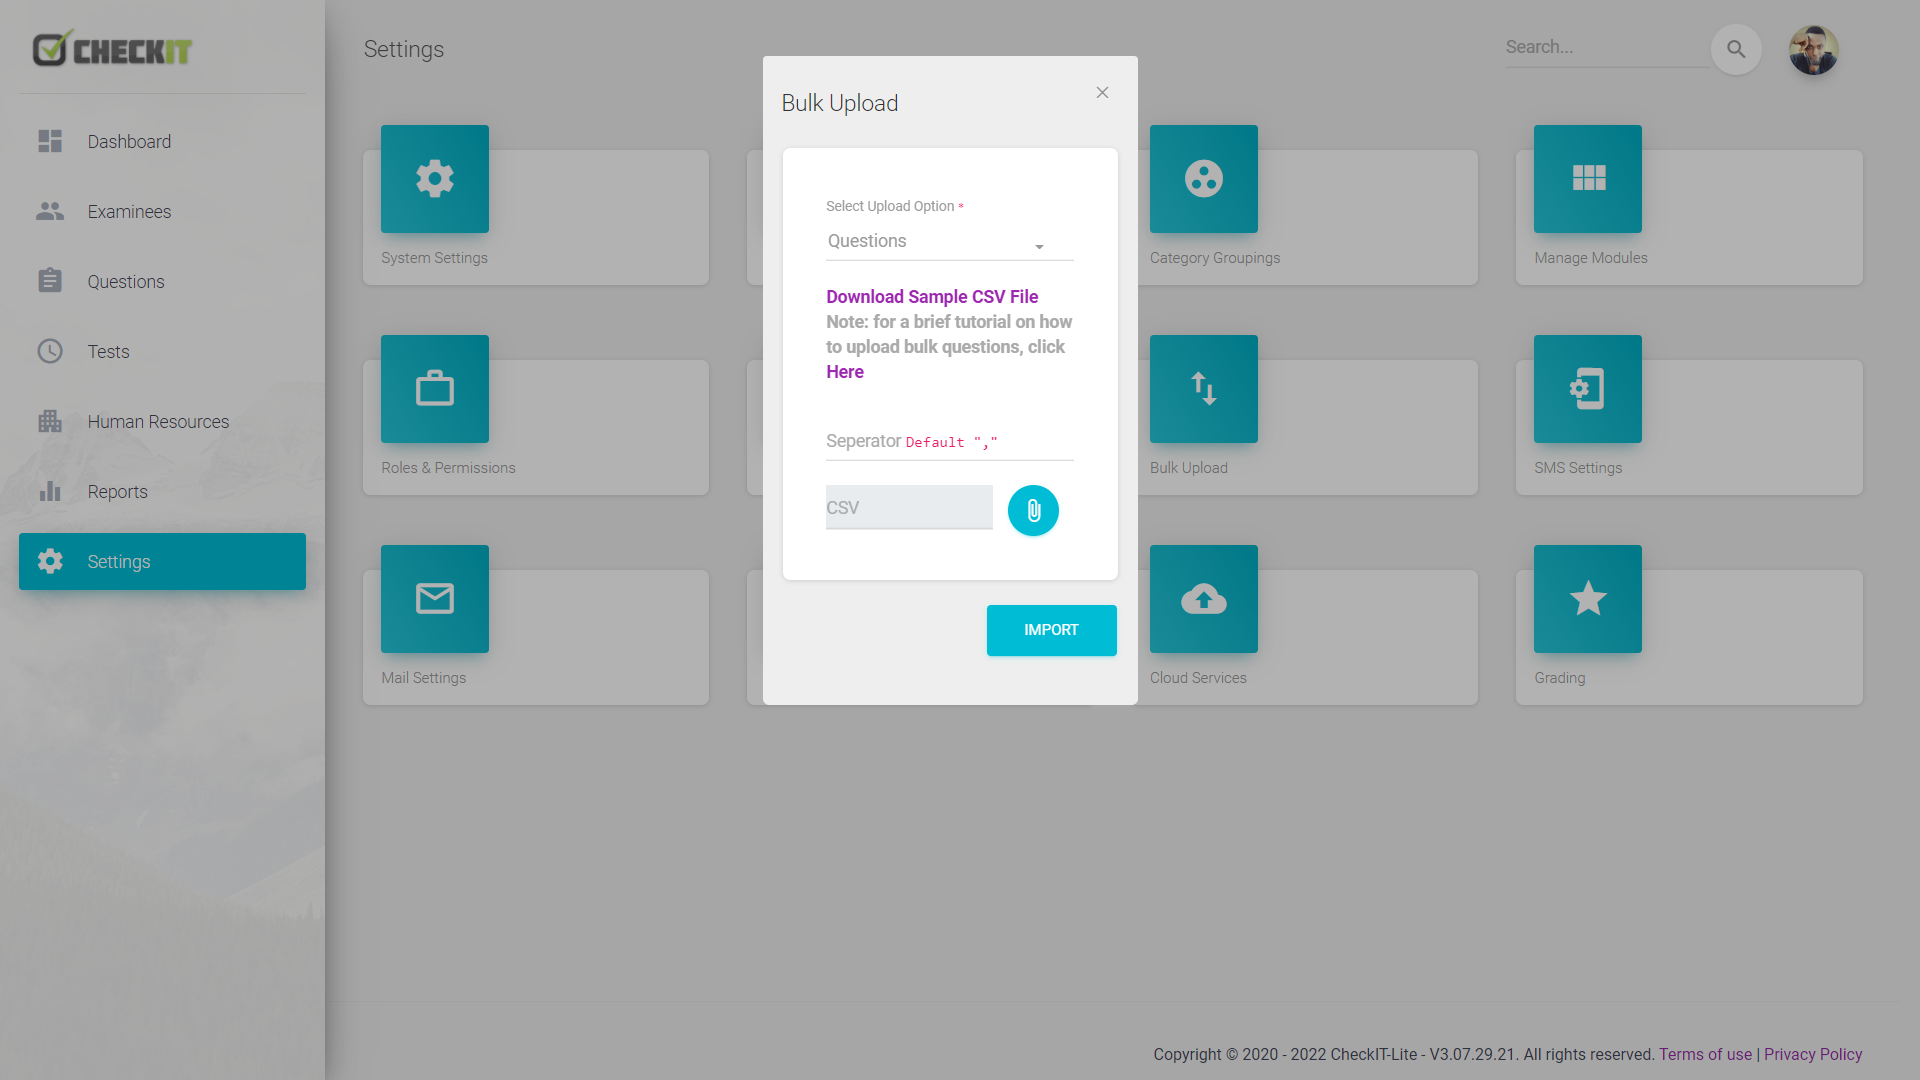
Bulk Upload Modal-box
- ● Select Upload Option: On the modal box, select the bulk Upload option;
- SMS Settings: Option to select bulk SMS service provider.
- Mail Settings: Option to select email sending protocol.
- Message Templates: Create SMS/email templates. Add Message
- ● Message Type: Defines what type of message been created, either Email or SMS.
- ● Sender: Defines source or sender of the message.
- ● Subject: Subject of the message been created.
- ● message: Compose your text/message.
- Cloud Services: Manage your database with this option.
- ● Backup button: The Backup button is used to create a saved reference point of your database to be downloaded or restored in the future.
- file_download - Download (Download your database).
- cached - Restore (Restore a later database).
- Grading: Use this option to set your custom grading system which can be used in-place of the systems grading system. Add Grading
- ● Ranking: Defines the rank of the grade eg. A+, D, F etc.
- ● Description: Describes the rank.
- ● From (%): Minimum performance rank range in percentage (should have overall percentage peak eg. 100%).
- ● To (%): Maximum performance rank range in percentage (should have overall percentage peak eg. 100%).
- ● Select Ranking Colour: Defines the colour of the rank value.
- ● 5 Star Rating: Use this feature to define how the rating of your rank would appear using 5 stars.
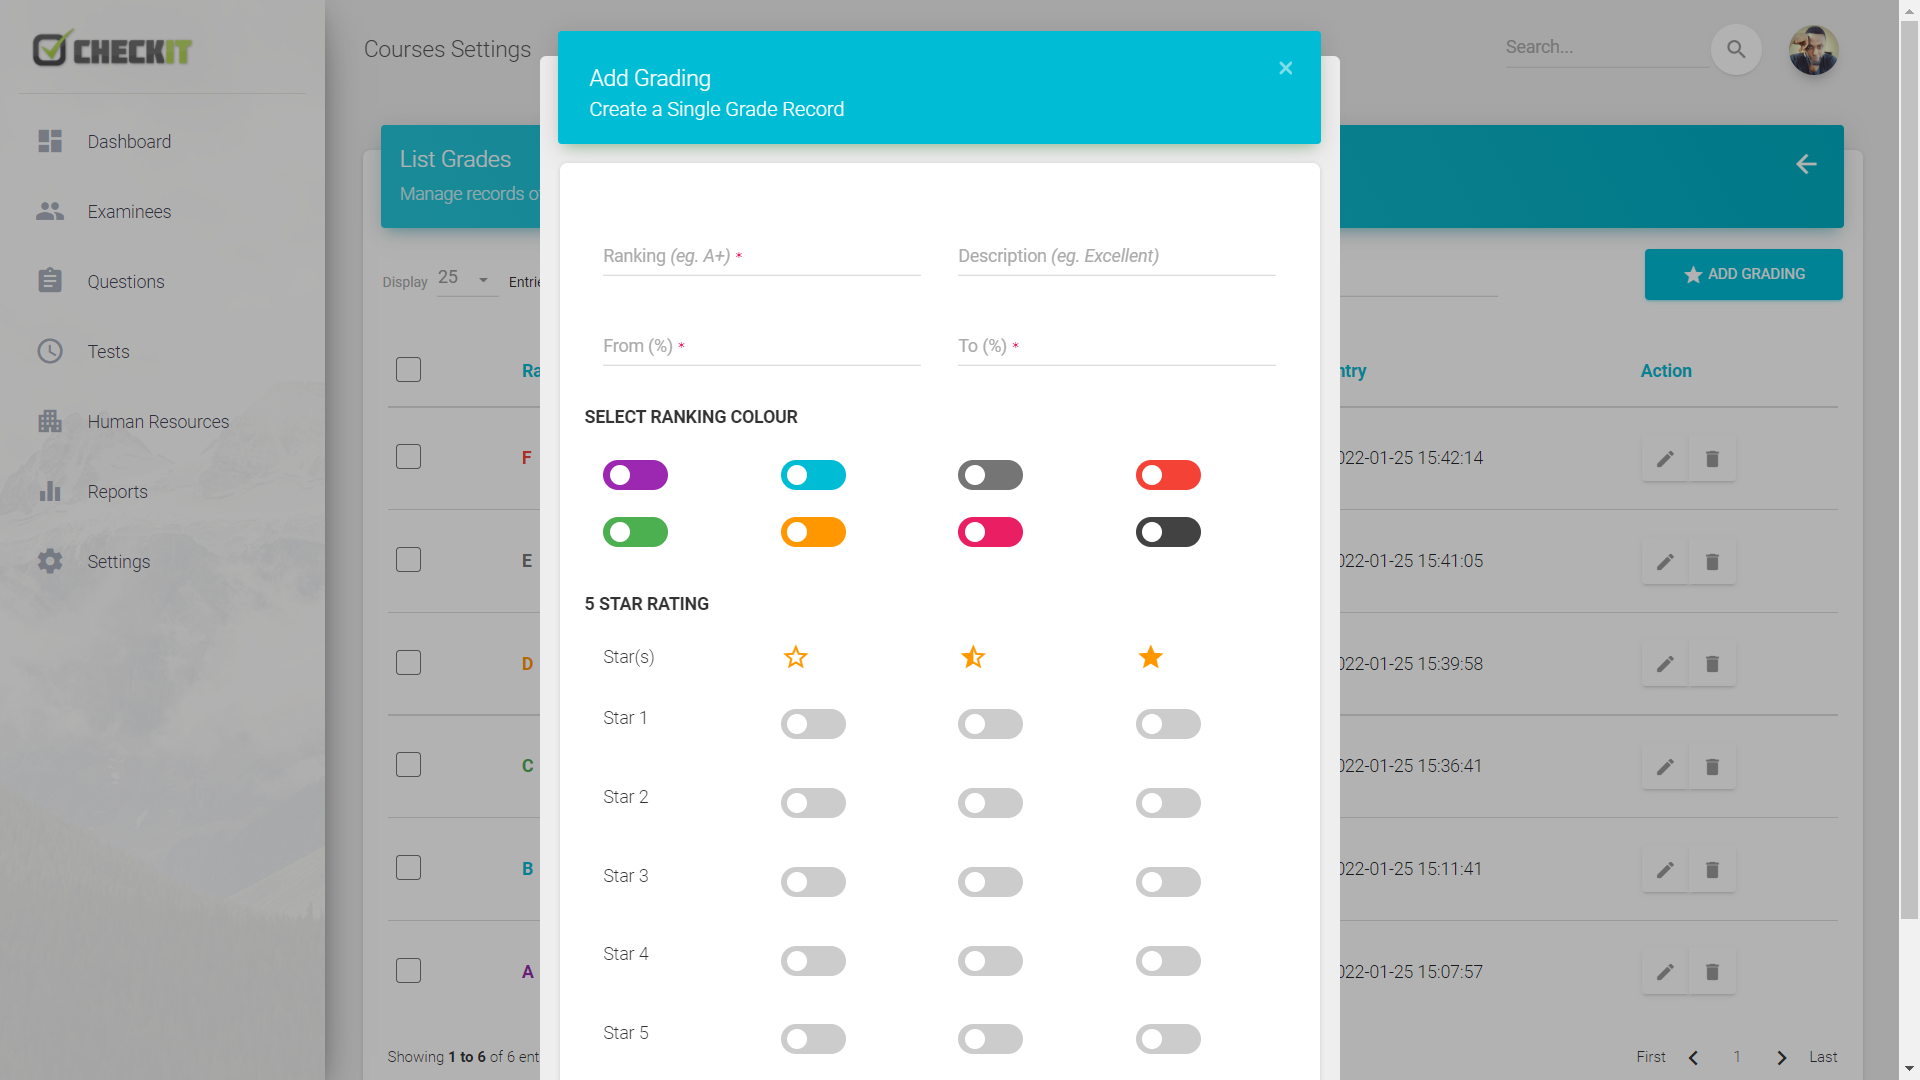
Add Grading Modal-box
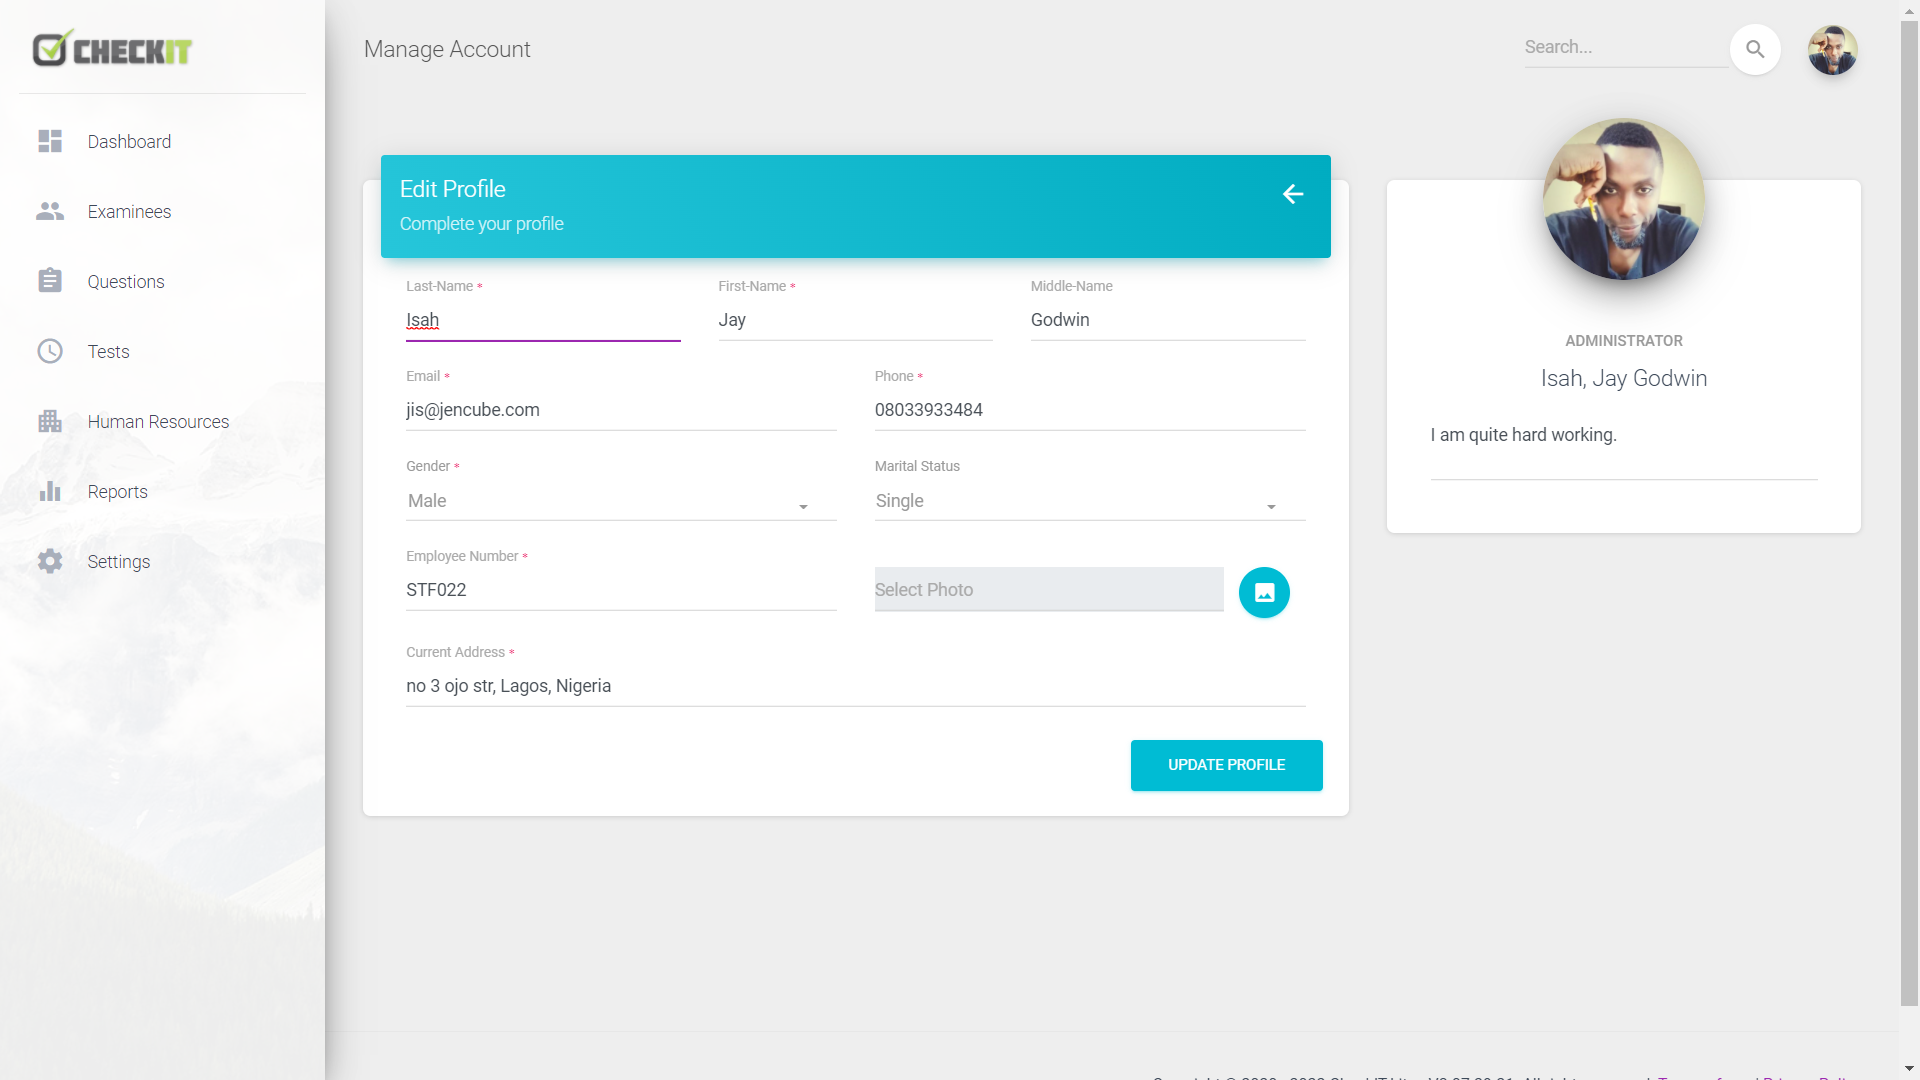
Manage Account page
Support Desk #back to top
Officially, we are not providing support but you can post on item comments page, if you can’t find answer to your question in this documentation. We will be updating the item time to time for;
- ● Fixes for bugs and reported issues with the item
- ● Updates to ensure on going compatibility and patch security vulnerabilities
Please visit our Feedback page or ask question support@thecheckit.com
Item Support includes:- ● Responding to questions or problems regarding the item and its features
- ● Fixing bugs and reported issues
- ● Providing updates to ensure compatibility with new software versions
- ● Customization and installation services
- ● Support for third party software and plug-ins
- ● Make sure your question is a valid Issue as regards the application and not a customization request.
- ● Make sure you have read through the documentation and any related video guides before asking support on how to accomplish a task.
- ● Make sure to double check the FAQs.
- ● If you have customized this application and now have an issue, back-track to make sure you didn't make a mistake. If you have made changes and can't find the issue, please provide us with your changelog.
Version History (Changelog) #back to top
Once again, thank you so much for purchasing CheckIT.
Changelog
                                    -----------------------------------------------------------------------------------------
                                    Version 3.10.11.23 - October 11th, 2023
                                    -----------------------------------------------------------------------------------------
                                    - Fixed auto selected template name for application
                                    - fixed UI/UX of error message page
                                    - fixed application's installation process
                                    - fixed pagination memory issue for list data items

                                    -----------------------------------------------------------------------------------------
                                    Version 3.02.27.22 - February 27th, 2022
                                    -----------------------------------------------------------------------------------------
                                    - fixed Course Permission bug
                                    - fixed Add Group bug
                                    - fixed Advance Search bug
                                    - improved on the display of documentation for bulk upload feature for questions
                                    - fixed system settings "select your theme" Gray_Hood issue
                                    - added log report stats on the dashboard
                                    - fixed login session time-out notification
                                    - remove license code field from installation process first stage
                                    - fixed button styling issue with Add Question form
Copyright and License #back to top
This Version is released under a Commercial License by Jencube.